Back to RasterLite2 Tutorials index
Tutorial: building and testing the Planet Earth sample
In this first tutorial we'll use the following input datasources: please download all them right now. They are Open Data released under a free license, and are available absolutely for free.- True Marble 2km: a worldwide synthetic collage of many Landsat cloud-free scenes.
- Natural Earth I: a worldwide land cover presented with a light, natural palette and supporting Shaded Relief, Water and Drainages.
- color ETOPO1: a pre-rendered Global Relief Model released from NOAA.
Step 1.a) creating the TrueMarble Coverage
$ rl2tool CREATE -db earth.sqlite -cov TrueMarble -smp UINT8 \
-pxl RGB -cpr JPEG -srid 4326 -res 0.0166666666666667

rl2tool: request is CREATE
===========================================================
              DB path: earth.sqlite
             Coverage: TrueMarble
          Sample Type: UINT8
           Pixel Type: RGB
      Number of Bands: 3
          Compression: JPEG (lossy)
  Compression Quality: 80
   Tile size (pixels): 512 x 512
                 Srid: 4326
Pixel base resolution: X=0.0166666666666667 Y=0.0166666666666667
======= Coverage Policies =======
Strict Resolution check: Disabled
 Mixed Resolutions mode: Disabled
  Section's Input Paths: Disabled
 Section's MD5 Checksum: Enabled
  Section's XML Summary: Enabled
===========================================================

     SQLite version: 3.8.6
 SpatiaLite version: 4.2.1-devel
RasterLite2 version: 1.0.0-rc1

Raster Coverage "TrueMarble" successfully created

Operation CREATE successfully completed
$
- we'll invoke from the command shell the rl2tool; this CLI tool is specifically intended to administer RasterLite2 datasources.
- in this case we'll pass the following arguments (explained one by one):
- CREATE this main keyword intends that we are trying to create a new, empty Coverage.
- -db earth.sqlite this specifies the target DB-file pathname; in this first example the DB-file doesn't yet exist, so it will be implicitly created at once.
- -cov TrueMarble this specifies the individual Coverage's name.
- -smp UINT8 this specifies the Coverage's Sample Type.
- -pxl RGB this specifies the Coverage's Pixel Type.
- -cpr JPEG this specifies that all Tiles in this Coverage must be JPEG compressed.
- -srid 4326 this specifies the Coverage's SRID.
- -res 0.0166666666666667 this specifies the Coverage's base level resolution.
- rl2tool reports a full success, so we'll now duly pass to the next step.
Step 1.b) populating the TrueMarble Coverage
$ rl2tool IMPORT -db earth.sqlite -cov TrueMarble \
-src TrueMarble.2km.21600x10800.tif -pyr

rl2tool; request is IMPORT
===========================================================
              DB path: earth.sqlite
    Input Source path: TrueMarble.2km.21600x10800.tif
             Coverage: TrueMarble
Immediately building Pyramid Levels
===========================================================

     SQLite version: 3.8.6
 SpatiaLite version: 4.2.1-devel
RasterLite2 version: 1.0.0-rc1

------------------
Importing: TrueMarble.2km.21600x10800.tif
    Image Size (pixels): 21600 x 10800
                   SRID: 4326
       LowerLeft Corner: X=-180.00 Y=-90.00
      UpperRight Corner: X=180.00 Y=90.00
       Pixel resolution: X=0.01666666666666666 Y=0.01666666666666666
>> Image successfully imported in: 1 mins 03 secs
  ----------
    Pyramid levels successfully built for Section 1
>> Total time: 1 mins 13 secs

Operation IMPORT successfully completed
$
- same as above; we'll invoke yet another time rl2tool.
- in this case we'll pass the following arguments (explained one by one):
- IMPORT this main keyword intends that we are trying to populate an already created Coverage by importing from an external datasource.
- -db and -cov: same as above.
- -src TrueMarble.2km.21600x10800.tif this specifies the pathname of the external datasource to be imported.
- -pyr this specifies that we do actually intend to immediately build any possible Pyramid Level.
Step 2.a) creating the NaturalEarth Coverage
$ rl2tool CREATE -db earth.sqlite -cov NaturalEarth -smp UINT8 \
-pxl RGB -cpr JPEG -srid 4326 -res 0.0166666666666667

rl2tool: request is CREATE
========================================================
              DB path: earth.sqlite
             Coverage: NaturalEarth
          Sample Type: UINT8
           Pixel Type: RGB
      Number of Bands: 3
          Compression: JPEG (lossy)
  Compression Quality: 80
   Tile size (pixels): 512 x 512
                 Srid: 4326
Pixel base resolution: X=0.0166666666666667 Y=0.01666666
======= Coverage Policies =======
Strict Resolution check: Disabled
 Mixed Resolutions mode: Disabled
  Section's Input Paths: Disabled
 Section's MD5 Checksum: Enabled
  Section's XML Summary: Enabled
========================================================

     SQLite version: 3.8.6
 SpatiaLite version: 4.2.1-devel
RasterLite2 version: 1.0.0-rc1

Raster Coverage "NaturalEarth" successfully created

Operation CREATE successfully completed
$
Not really different from step 1.a): we are simply creating yet another RasterLite2 Coverage within the same DB-file.
Step 2.b) populating the NaturalEarth Coverage
$ rl2tool IMPORT -db earth.sqlite -cov NaturalEarth \
-src NE1_HR_LC_SR_W_DR.tif -pyr

rl2tool; request is IMPORT
==========================================================
              DB path: earth.sqlite
    Input Source path: NE1_HR_LC_SR_W_DR.tif
             Coverage: NaturalEarth
Immediately building Pyramid Levels
==========================================================

     SQLite version: 3.8.6
 SpatiaLite version: 4.2.1-devel
RasterLite2 version: 1.0.0-rc1

------------------
Importing: NE1_HR_LC_SR_W_DR.tif
    Image Size (pixels): 21600 x 10800
                   SRID: 4326
       LowerLeft Corner: X=-180.00 Y=-90.00
      UpperRight Corner: X=180.00 Y=90.00
       Pixel resolution: X=0.01666666666667 Y=0.0166666666
>> Image successfully imported in: 2 mins 30 secs
  ----------
    Pyramid levels successfully built for Section 1
>> Total time: 2 mins 41 secs

Operation IMPORT successfully completed
$
Exactly the same as in step 1.b)
Step 3.a) creating the Etopo1 Coverage
$ rl2tool CREATE -db earth.sqlite -cov Etopo1 -smp UINT8 \
-pxl RGB -cpr JPEG -srid 4326 -res 0.0166666666666667

rl2tool: request is CREATE
===========================================================
              DB path: earth.sqlite
             Coverage: Etopo1
          Sample Type: UINT8
           Pixel Type: RGB
      Number of Bands: 3
          Compression: JPEG (lossy)
  Compression Quality: 80
   Tile size (pixels): 512 x 512
                 Srid: 4326
Pixel base resolution: X=0.0166666666666667 Y=0.0166666666666667
======= Coverage Policies =======
Strict Resolution check: Disabled
 Mixed Resolutions mode: Disabled
  Section's Input Paths: Disabled
 Section's MD5 Checksum: Enabled
  Section's XML Summary: Enabled
===========================================================

     SQLite version: 3.8.6
 SpatiaLite version: 4.2.1-devel
RasterLite2 version: 1.0.0-rc1

Raster Coverage "Etopo1" successfully created

Operation CREATE successfully completed
$
Same as in steps 1.a) and 2.a)
Step 3.b) populating the Etopo1 Coverage
$ rl2tool IMPORT -db earth.sqlite -cov Etopo1 \
-src color_etopo1_ice_full.tif -pyr

rl2tool; request is IMPORT
===========================================================
              DB path: earth.sqlite
    Input Source path: color_etopo1_ice_full.tif
             Coverage: Etopo1
Immediately building Pyramid Levels
===========================================================

     SQLite version: 3.8.6
 SpatiaLite version: 4.2.1-devel
RasterLite2 version: 1.0.0-rc1

------------------
Importing: color_etopo1_ice_full.tif
    Image Size (pixels): 21600 x 10800
                   SRID: 4326
       LowerLeft Corner: X=-180.01 Y=-89.99
      UpperRight Corner: X=179.99 Y=90.01
       Pixel resolution: X=0.01666666666667 Y=0.01666666666667
>> Image successfully imported in: 2 mins 19 secs
  ----------
    Pyramid levels successfully built for Section 1
>> Total time: 2 mins 31 secs

Operation IMPORT successfully completed
$
Same as in steps 1.b) and 2.b)
Step 4.a) a final artistic touch
You can now directly check the DB-file using e.g. spatialite_gui; please focus your attention on the raster_coverages table.This one is a meta-table specifically intended to support Raster Coverages, and is the exact equivalent of what geometry_columns is intended to be for Vector Layers.
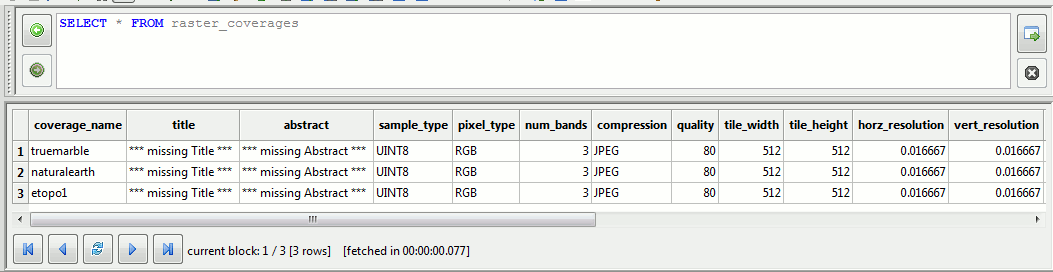
As you can easily check, all three Coverages are now nicely registered within the raster_coverages table. Anyway, both the title and abstract columns simply report some unpleasant and meaningless default value.
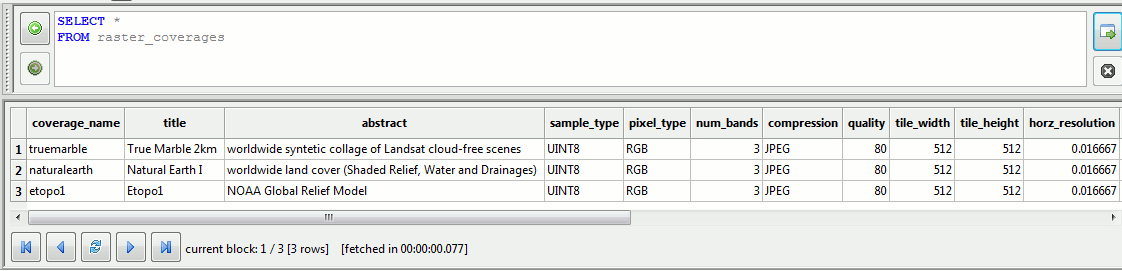
You are now simply expected to execute just few UPDATE SQL statements, and finally you'll have all your Coverages supported by appropriate and meaningful title and abstract columns, as shown in this figure.
Step 4.b) a final artistic touch (alternative way)
SELECT RL2_SetCoverageInfos('truemarble', 'TrueMarble 2km', 'worldwide synthetic collage of  Landsat cloud-free scenes');
SELECT RL2_SetCoverageInfos('naturalearth', 'Natural Earth 1', 'worldwide land cover (Shaded Relief, Water and Drainages)');
SELECT RL2_SetCoverageInfos('etopo1', 'Etopo1', 'NOAA Global Relief Model');
You could alternatively get the same identical result by simply executing standard SQL statements:
- the RL2_SetCoveragesInfos() SQL function is specifically intended to assign a Title and an Abstract to some Coverage as identified by its Name.
Just for pedantic clarity:- every Coverage is identified by its Name; this is expected to simply be an internal unique identifier, and is not necessarily intended for an easy and immediate human comprehension.
- it surely is a good practice to set a clear and not ambiguous Title, so to allow humans to easily understand what is the intended role of this Coverage.
- and an extended Abstract could then be used in order to specify more technically relevant informations about this Coverage.
- Please note: this naming schema exactly corresponds to one dictated by the OGC WMS international standard.
Step 5) starting the light-weight WMS server
RasterLite2 includes a light-weight but almost complete WMS 1.3.0 server. It's a basically simple, zero-admin and absolutely complexity-free component.
$ wmslite -db earth.sqlite

======================================================
              WmsLite server startup
======================================================
         SQLite version: 3.8.4.1
     SpatiaLite version: 4.2.0-devel
    RasterLite2 version: 0.8
======================================================
Publishing layer "truemarble"
Publishing layer "naturalearth"
Publishing layer "etopo1"
======================================================
    HTTP micro-server listening on port: 8080
======================================================
Just execute wmslite from the command shell by specifying the pathname of the DB-file you intend to publish, and that's all.As you can easily check, now the WMS server is listening on localhost port 8080, and is immediately ready to accept and process standard WMS requests.
Step 6) directly testing your RasterLite2 Coverages via WMS
In this first example we'll use the LibreWMS GUI tool directly accompanying RasterLite2 and completely based on the WMS client internally implemented by librasterlite2.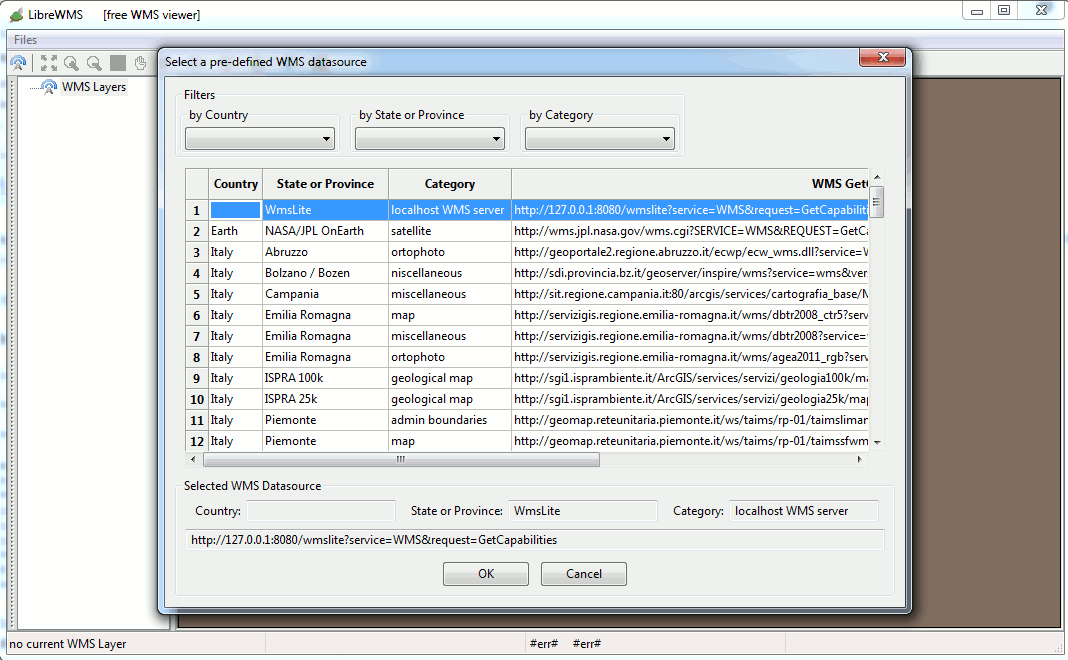
You simply have to establish a WMS connection to localhost (aka IP address 127.0.0.1) on the IP port 8080.
Then you simply have to connect all three Coverages being published as WMS layers, one at each time.
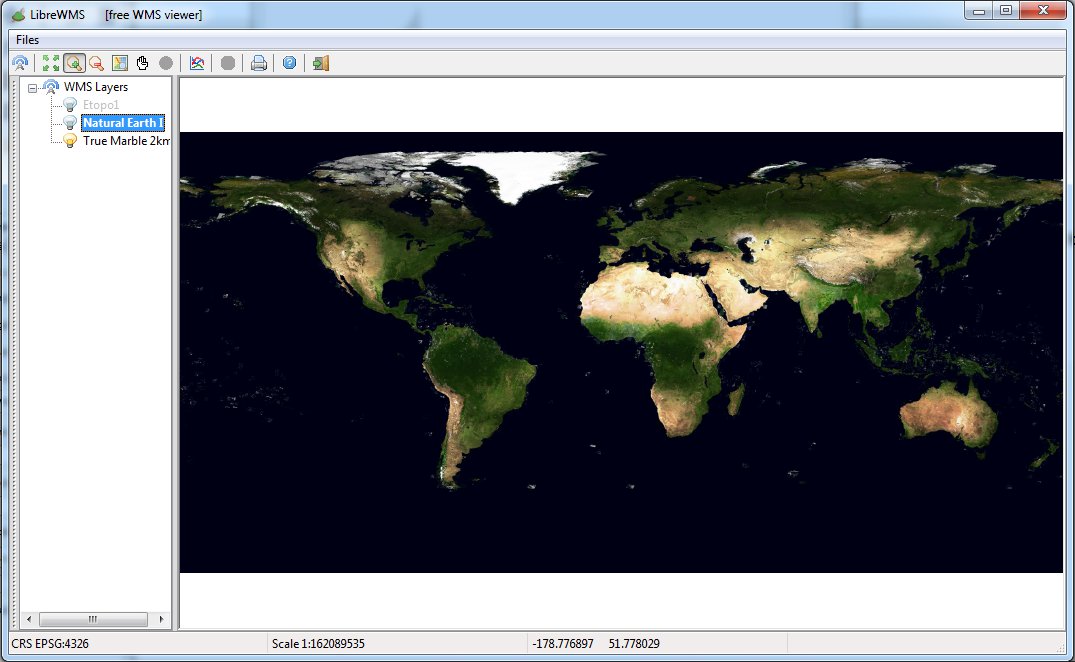
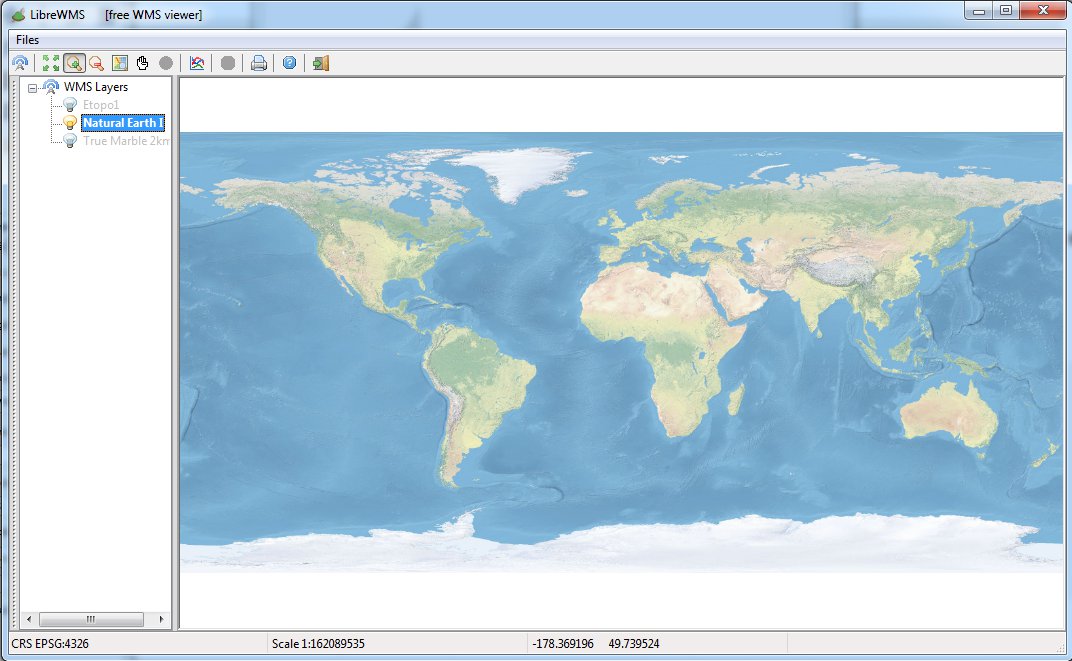
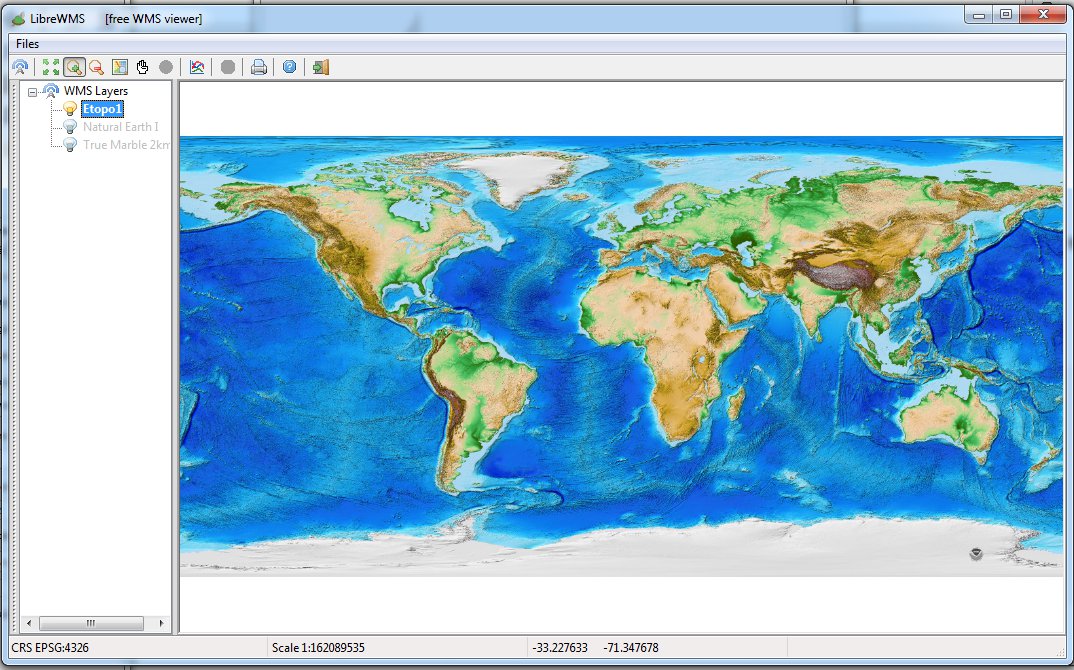
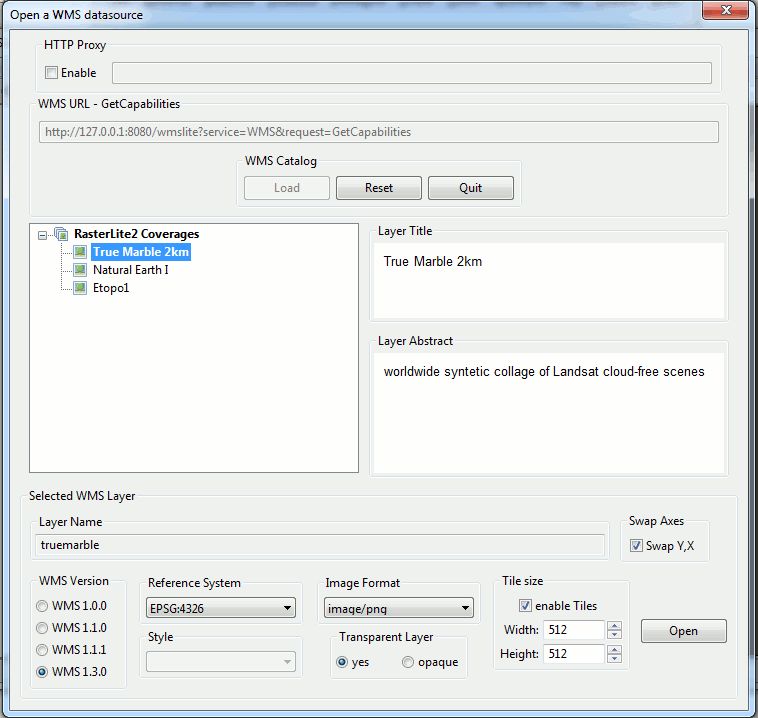
You'll be immediately ready to visualize a full interactive WMS Map; and you could obviously switch on and off each layer at your will.
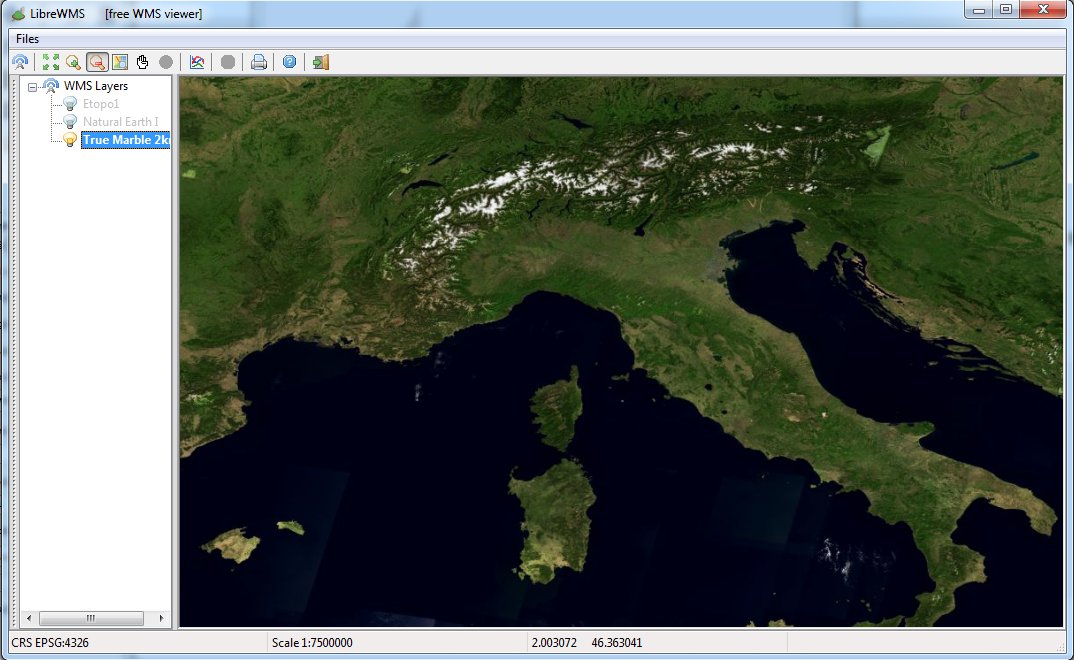
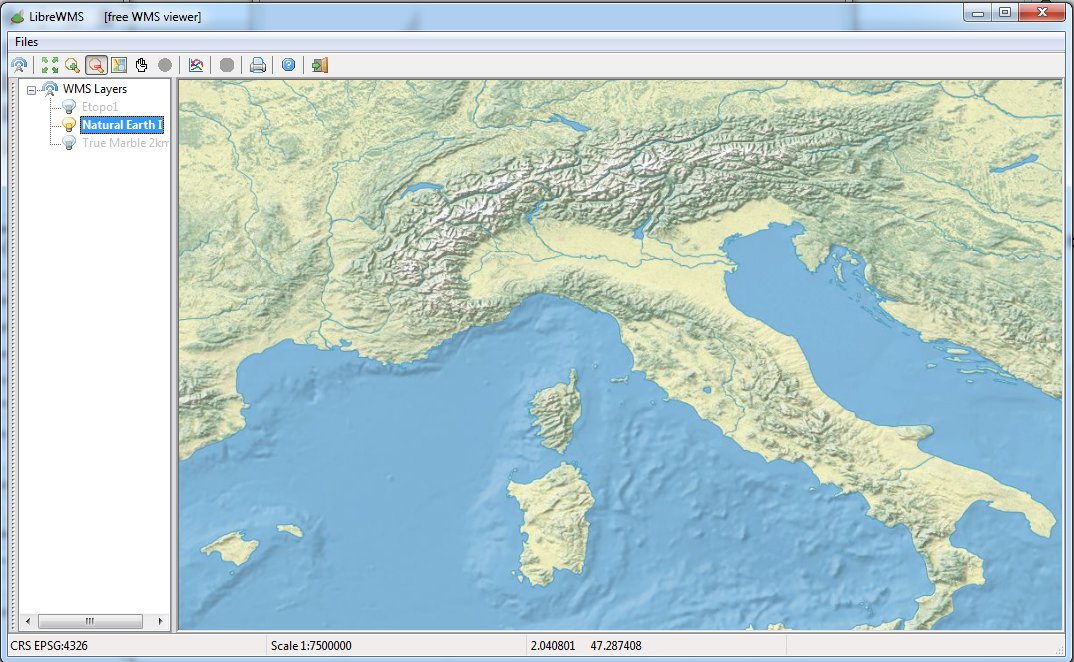
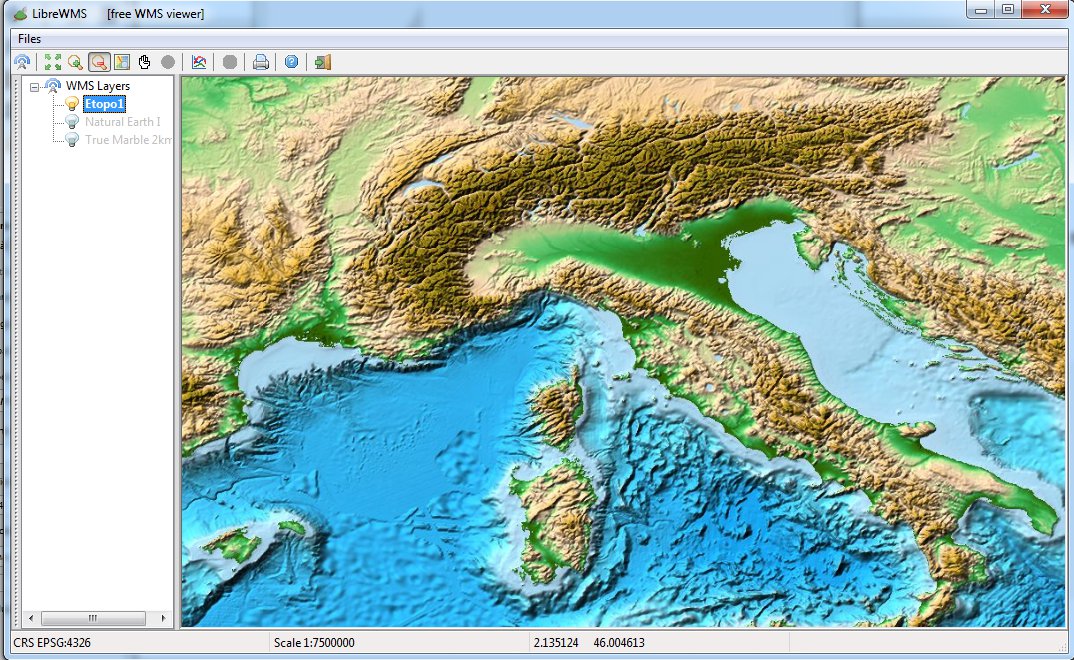
And you could eventually play a little bit around while testing zoom-in, zoom-out and panning basic capabilities.
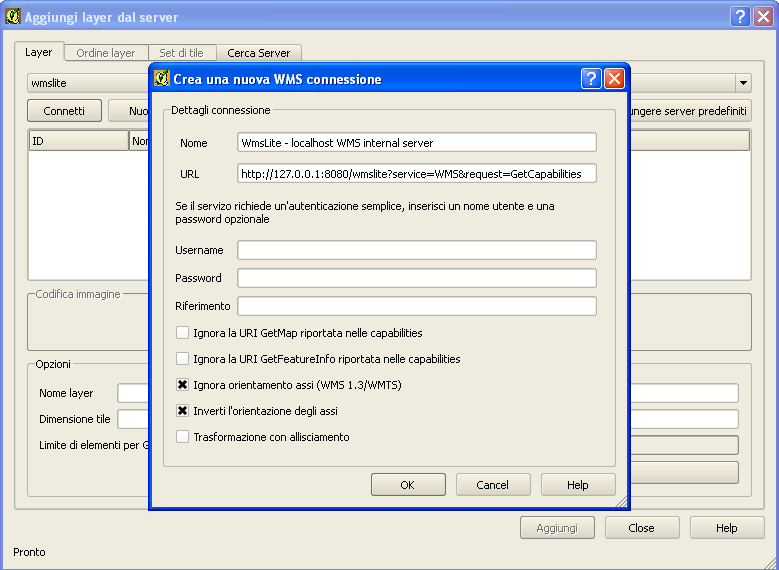
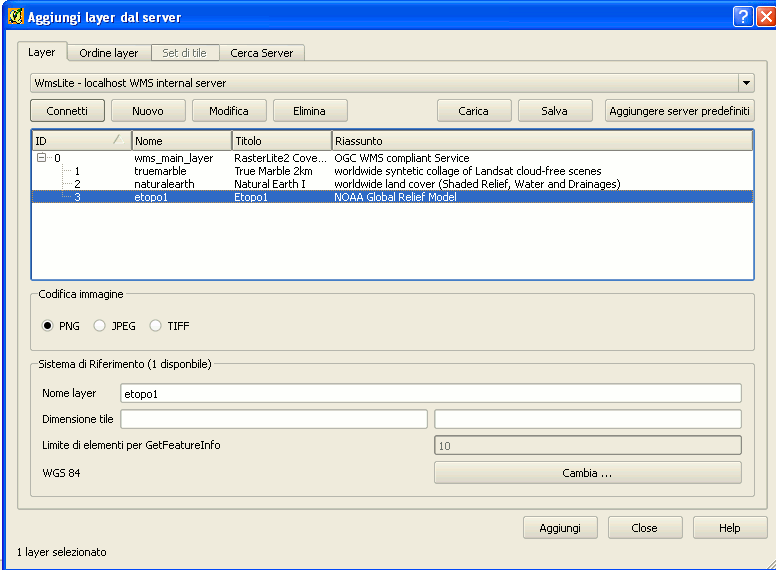
Please note: using the LibreWMS tool isn't at all a strict requirement. WMS is expected to be an universal standard protocol, so you could freely us any WMS client at your discretion. You simply have to establish a connection to the following URL, and that should be all that is required in order to test the wmslite server.
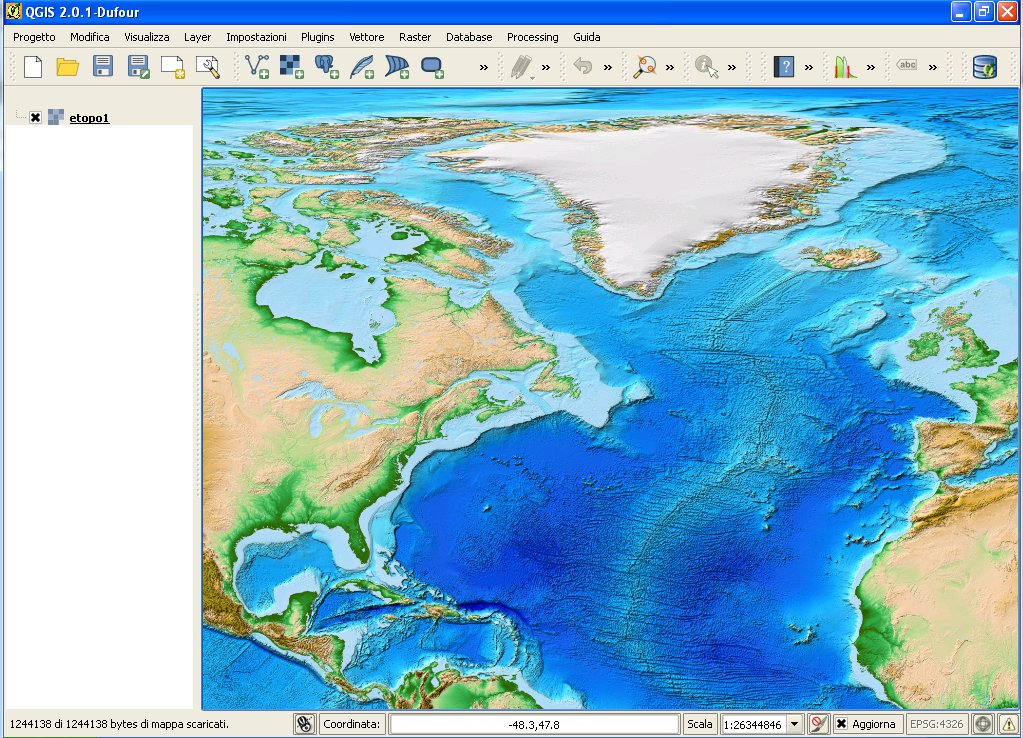
http://127.0.0.1:8080/wmslite?service=WMS&request=GetCapabilitiesThe following figures represents a quick example showing how to connect QGIS to the wmslite server.
Back to RasterLite2 Tutorials index