Back to World Atlas Index
In this step of the World Atlas tutorial we'll prepare an advanced Registered Vector Style supporting the Airports Vector Coverage that we've created in the previous step.
We'll base such advanced Style on some External Resources that you can download from here
This resource pack contains:
- Two True Type Fonts freely distributed by Google under the OFL License terms.
- They are the Blaka and Lobster Fonts; both them seem rather fancy to be very easily recognizable.
- A small PNG icon representaing an airplane that we'll use as a Graphic Point Symbolizer
|
Importing the External Resources
using the wizards supported by the GUI
|
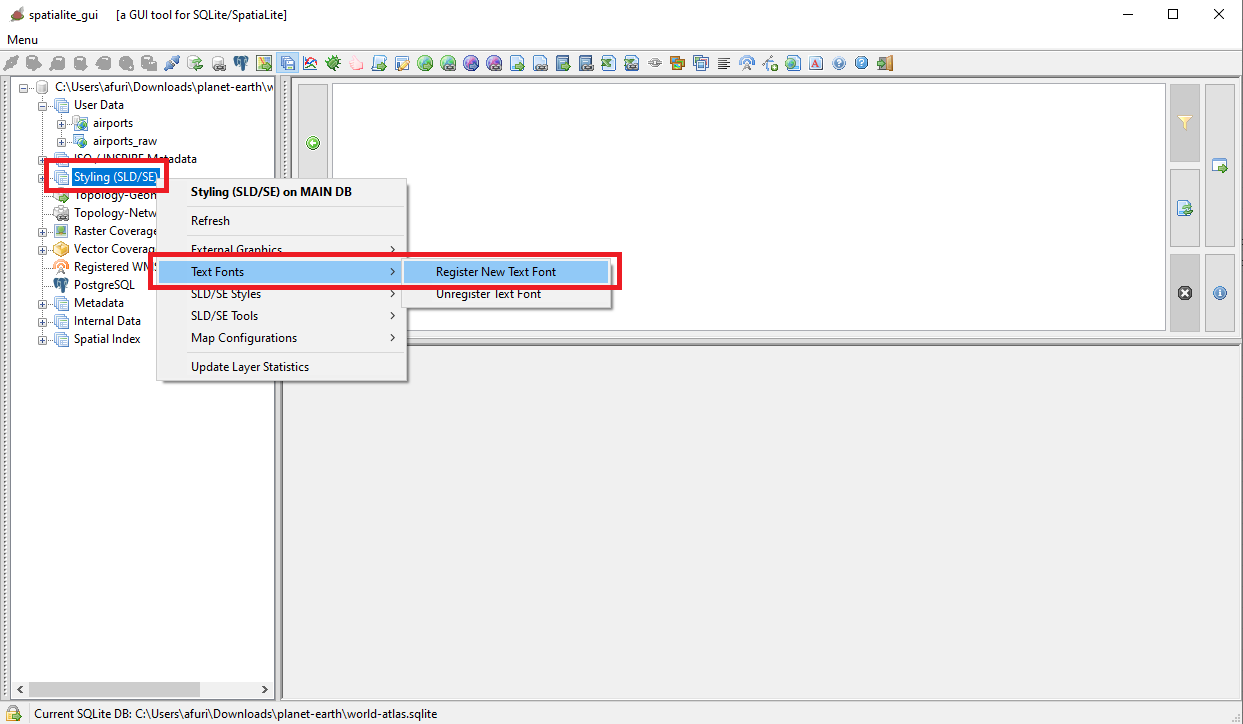
The side figure shows the menu item you have to select for Importing Font(s).
|
| 
|
|
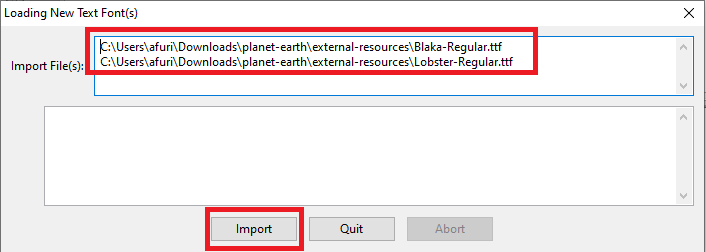
Just select the files containing the Font(s) and then press the Import button to confirm.
|
| 
|
|
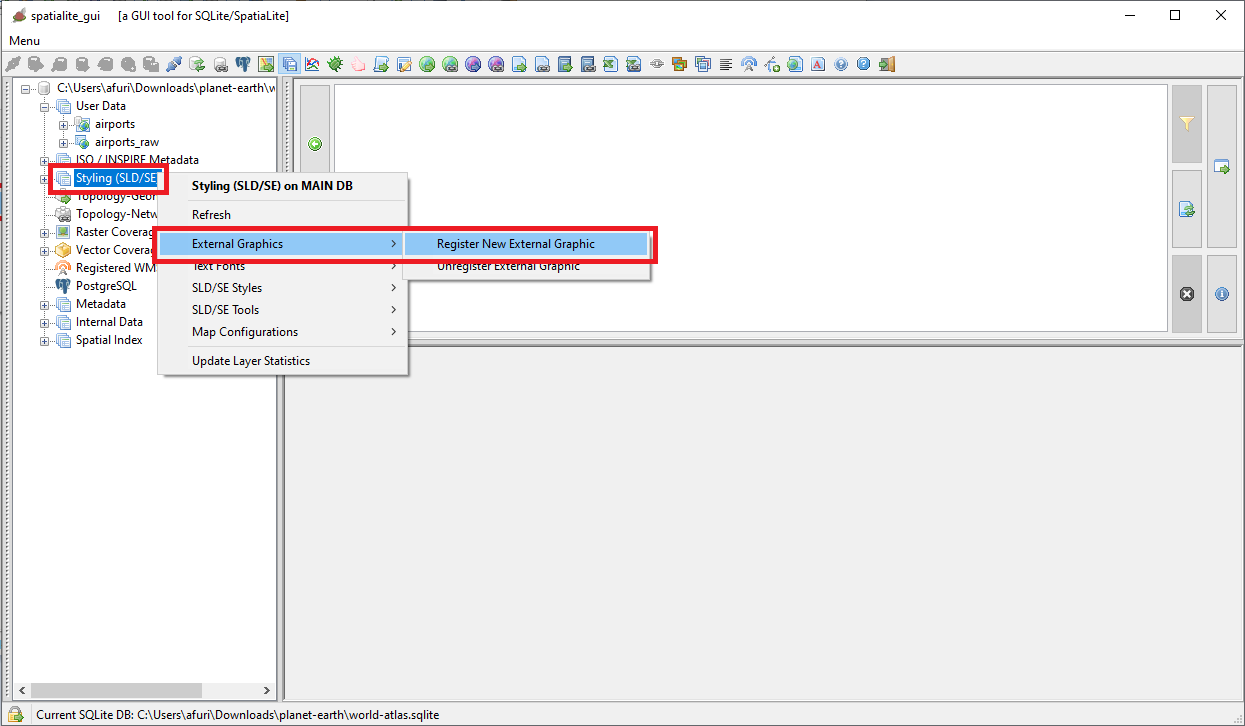
The side figure shows the menu item you have to select for Importing External Graphic resource(s).
|
| 
|
|
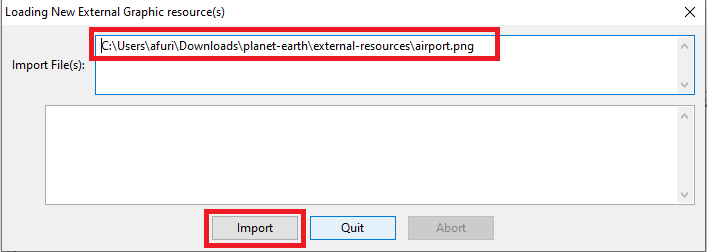
Just select the files containing the External Graphic resource(s) and then press the Import button to confirm.
|
| 
|
Importing the External Resources
Alternative approach: using SQL functions
Remember: both
SpatiaLite and
RasterLite2 always offer full SQL support for all functionalites, this obviously including
Fonts and
External Graphic resources.
SpatiaLite implements the following SQL functions supporting
Fonts; you can learn more about them from
here:
- SE_RegisterExternalGraphic()
- SE_UnregisterExternalGraphic()
RasterLite2 implements the following SQL functions supporting
External Graphic respurces; you can learn more about them from
here:
- RL2_RegisterFont()
- RL2_ExportFontToFile()
- RL2_IsValidFont()
- RL2_CheckFontFacename()
- RL2_GetFontFamily()
- RL2_IsFontBold()
- RL2_IsFontItalic()
Configuring Advanced Styles
We are about to handwrite a complex and sophisticated Style.
This is certainly a rather difficult task, so we'll try to get a substantial help by wisely using the Wizards supported by the GUI
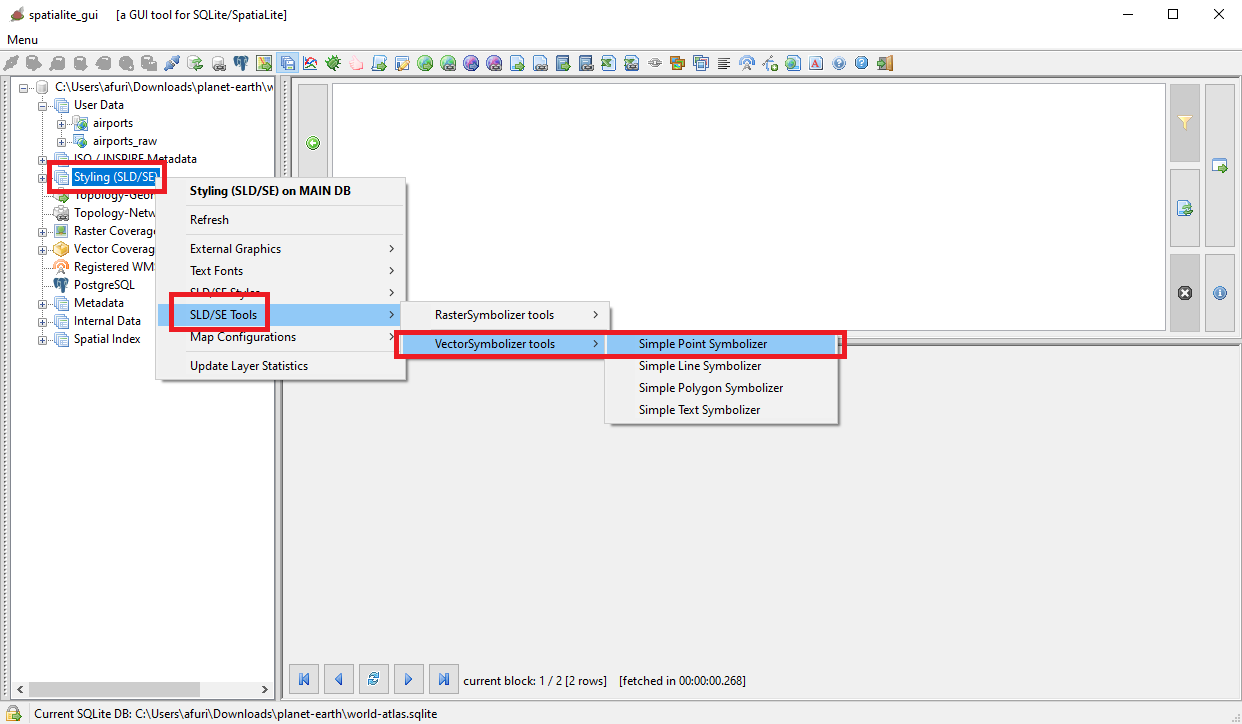
More precisely, we'll use the specific Wizard supporting Simple Point Symbolizer
|
|
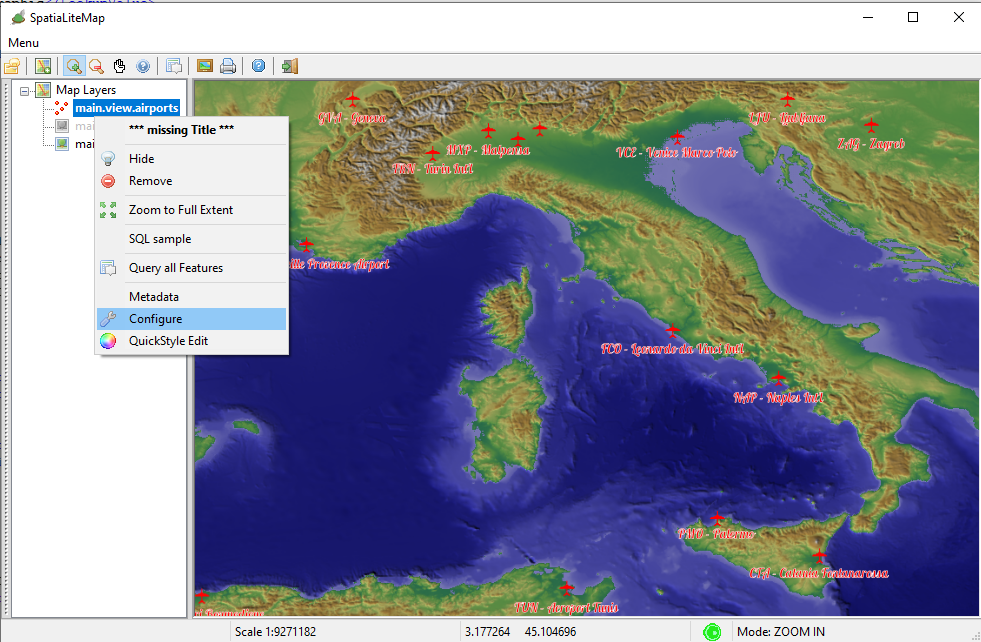
From the Menu you have now to select the Menu Item shown in the side figure.
|
| 
|
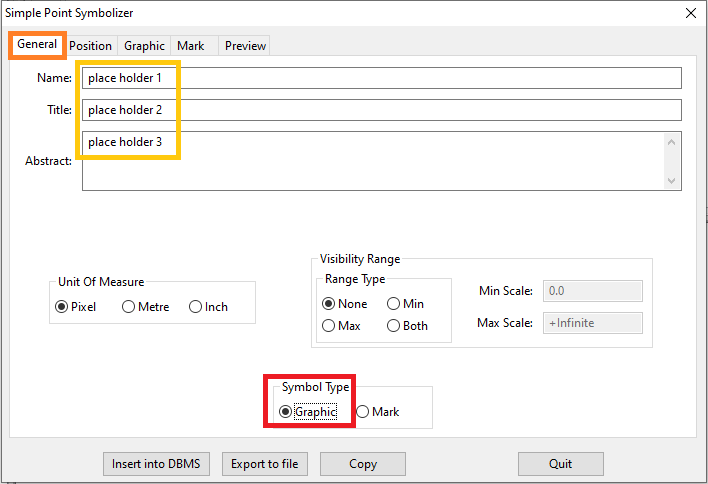
We'll start from the General tab of the Wizard.
- In this specific case don't worry about setting meaningful vales for Name, Title and Abstract as we'll fix them in a later step.
- What's very relevant is to select a Graphic Symbol Type
|
| 
|
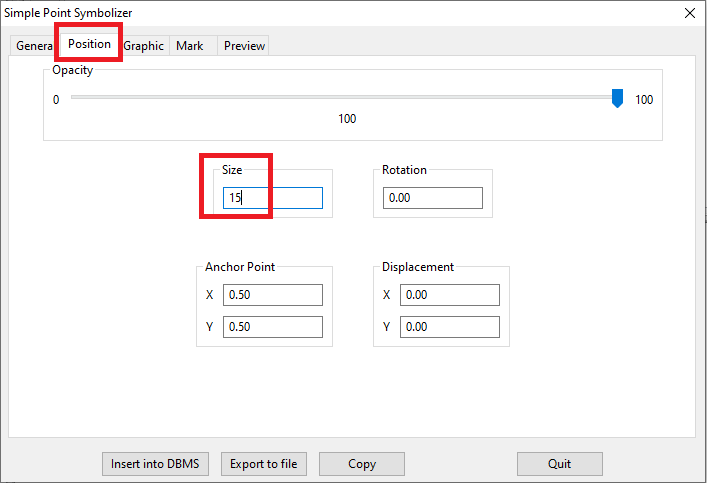
We'll now pass to the Position tab of the Wizard.
- You simply have to set Size = 15
|
| 
|
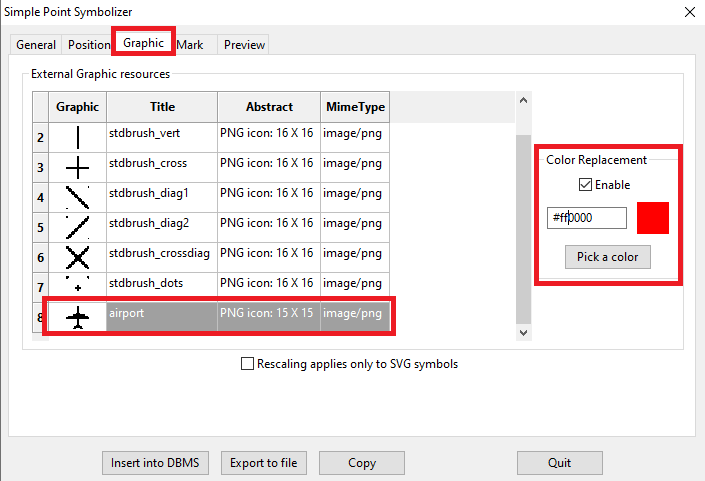
The Graphic tab of the Wizard is the most critical one.
- Select from the list the airport icon
- Then enable Color Replacement and set a red color (#ff0000 in hex RGB)
|
| 
|
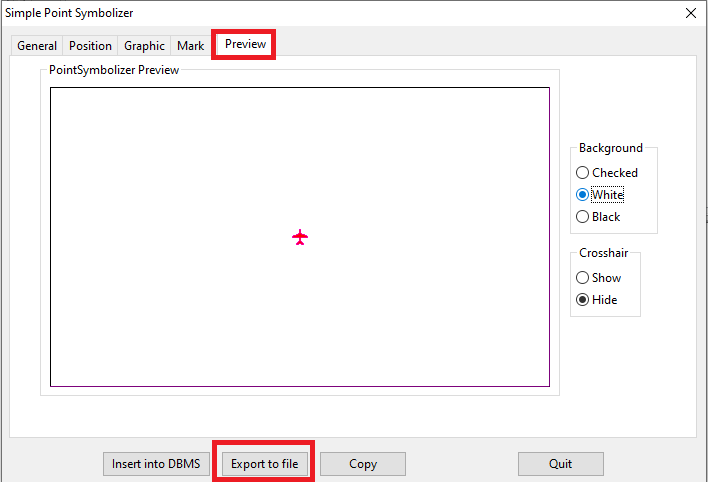
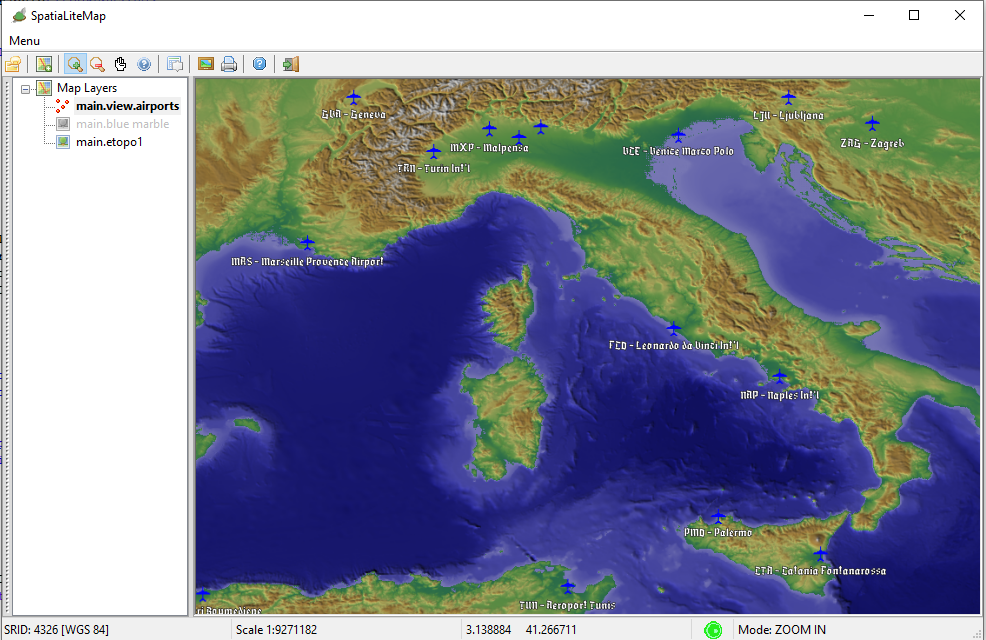
Last step: go to the Preview tab of the Wizard.
- Check if everything looks fine.
- Then press the Export to file button to save the auto-generated XML Style somewhere.
- Finally press the Quit button to close the Wizard.
|
| 
|
|
piro piro
| 
|
|
piro piro
| 
|
|
piro piro
| 
|
|
piro piro
| 
|
|
piro piro
| 
|
Back to World Atlas Index