We'll only examine the main differences from the previous case that we have already seen for BlueMarble
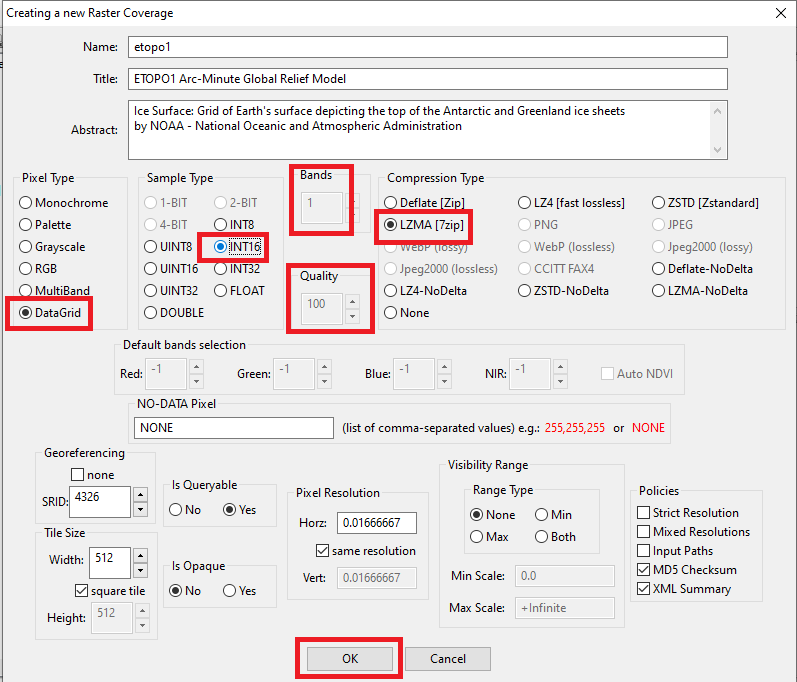
- ETOPO1 isn't an image, it's instead a rectangular matrix of numeric values, a so called DataGrid:
- We can still derive some image from a DataGrid, but this is an indirect process requiring to define some appropriate rule for translating cell values into false colors
- More specifically, ETOPO1 is a Digital Terrain Model (DTM) and each Pixel represents an elevation value measured in metres relative to the sea level
Values range from an abyssal depth of -10898 (Mariana Trench) and a top height of 8271 (Mount Everest)
- Conclusions:
- the appropriate Pixel Type is DataGrid
- each Pixel will be stored as a single (1 band) value of the INT16 type (signed integer, 16 bits.
- the most appropriate compression algorithm suporting such a configuration is LZMA that being a lossless compresion directly ensures an uncompromised 100% quality.
Note as we've alrady seen about Jpeg2000, LZMA too is reasonably fast when decompressing, but is really heavy and slow when compressing.
|
| 
|
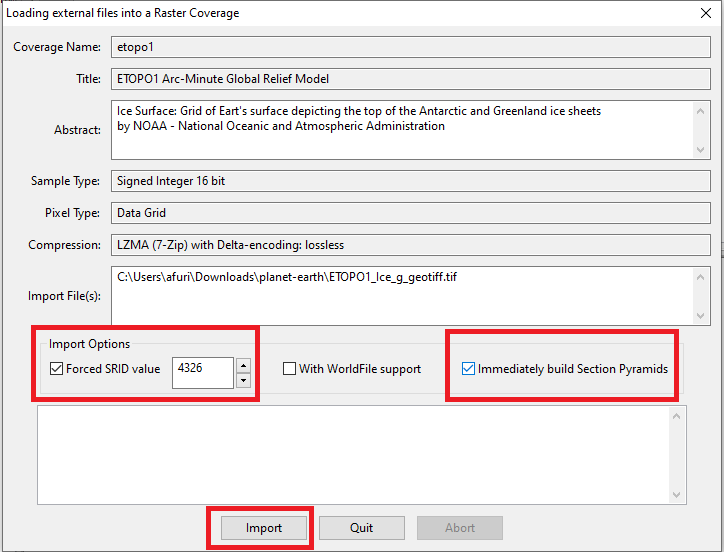
Importing ETOPO1_ice_g_geotiff.tif into the Raster Coverage is almost the same as we've already seen for BlueMarble
Except that for a striking difference:
- This is not a simple TIFF, it's a GeoTIFF internally shipping all that is required for georeferencing the Raster on the Map.
- And consequently we must not activate the optional WorldFile option.
|
Note: also in this case we can substantially speed-up the import process by activating parallel processing
We've already called RL2_SetMaxThreads(32) and this is a persistent setup.
Just in case, if you want to check the current setting you can now execute
SELECT RL2_GetMaxThreads();
------------------
32
|
| 
|
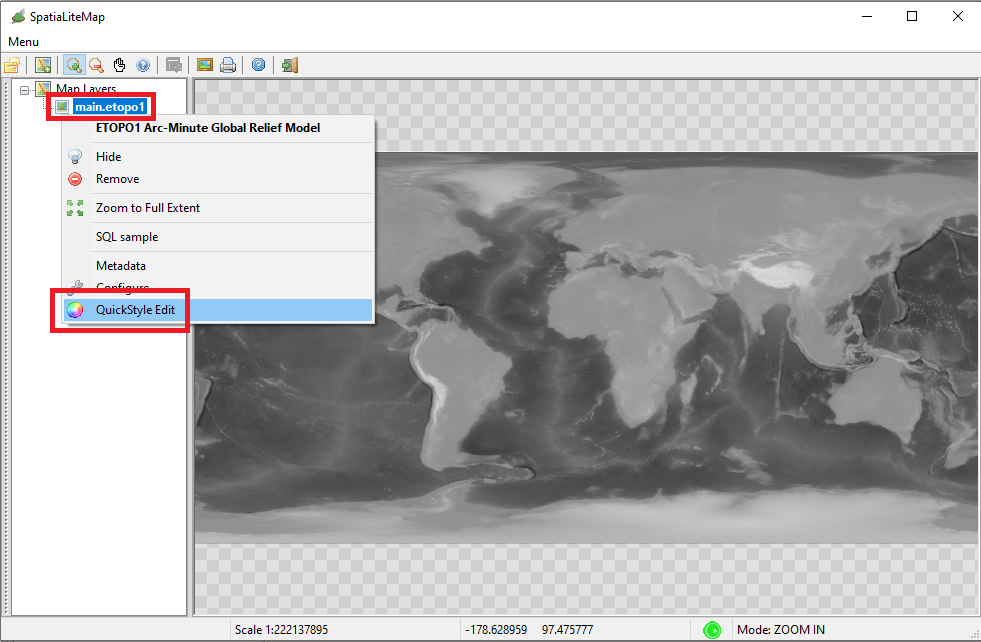
The import process is finished; you are now ready for testing the Etopo1 Raster Coverage.
- Open a Map Panel
- Then attach Etopo1 to it
- Nasty surprise: what is displayed on the Map is an awful slopppy gray image.
|
Etopo1 is a DataGrid: as anticipated some appropriate Style is absolutely required in order to get a decent false colors image.
What you are currently seeing on the screen is the direct effect of applying the default style, that for DataGrids simply translate values into a dull grayscale image.
|
|
The side figure shows the menu item you have to select for defining a more reasonable and convenient Style (namely: a QuickStyle)
|
| 
|
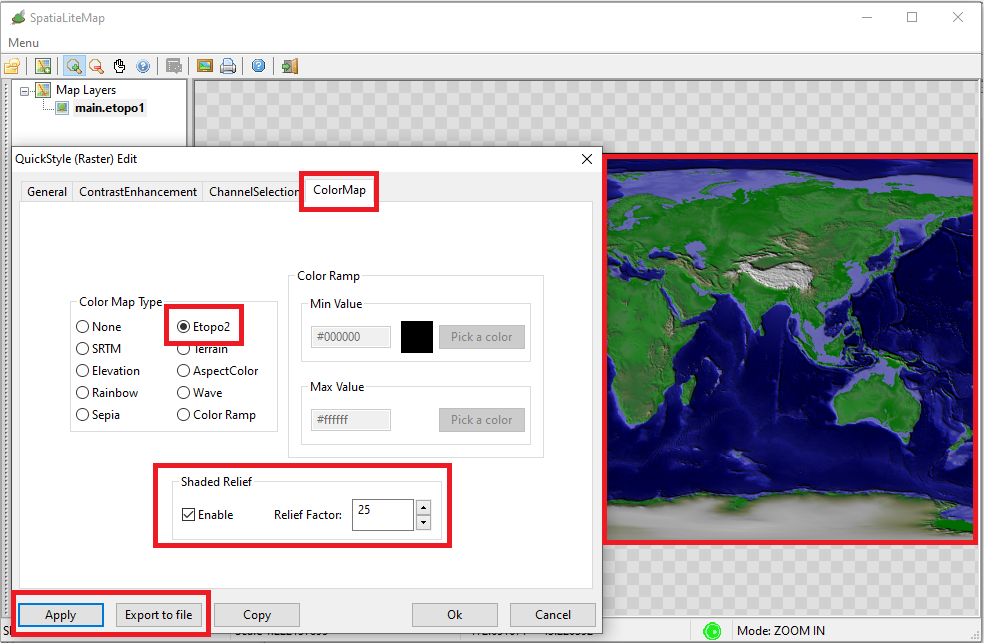
As you can see on the side figure, the most interesting things for styling a DataGrid Raster Coverage are placed in the ColorMap tab of the QuickStyle configuration Wizard.
- a ColorMap is just the standard mechanism provided by the SE standard allowing to transform numeric cell values into false colors
- defining an useful ColorMap is a complex task, but QuickStyles natively support several pre-defined ColorMaps, making this task simple and user-friendly.
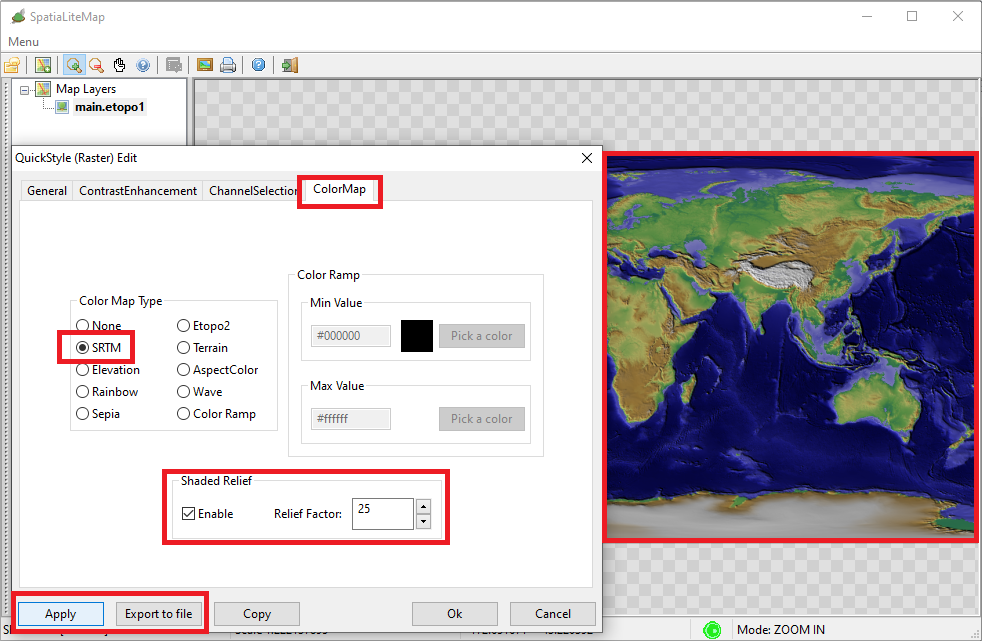
You only have to select a couple of options in order to configure some pre-defined ColorMap:
- Select one of supported ColorMaps: in this case Etopo2
- Then check the Shaded Relief option.
- Finally, press the Apply button so to refresh the Map on the screen accordingly to the ColorMap that you've just selected.
|
|
Hint: please test the visual difference between applying on not the Shaded Relief option.
|
Last final step:
- Now press the Export to file button and save the SLD/SE XML corresponding to the current QuickStyle into an external file named etopo2.xml
- We'll see soon why we are doing such a thing.
|
| 
|
Same as above:
- Don't close the QuickStyle Wizard
- Now select the SRTM ColorMap, then press the Apply button so to check how the new QuickStyle will be displayed on the screen.
- Finally press the Export to file button and save the current QuickStyle into an external file named srtm.xml
|
| 
|
Once again:
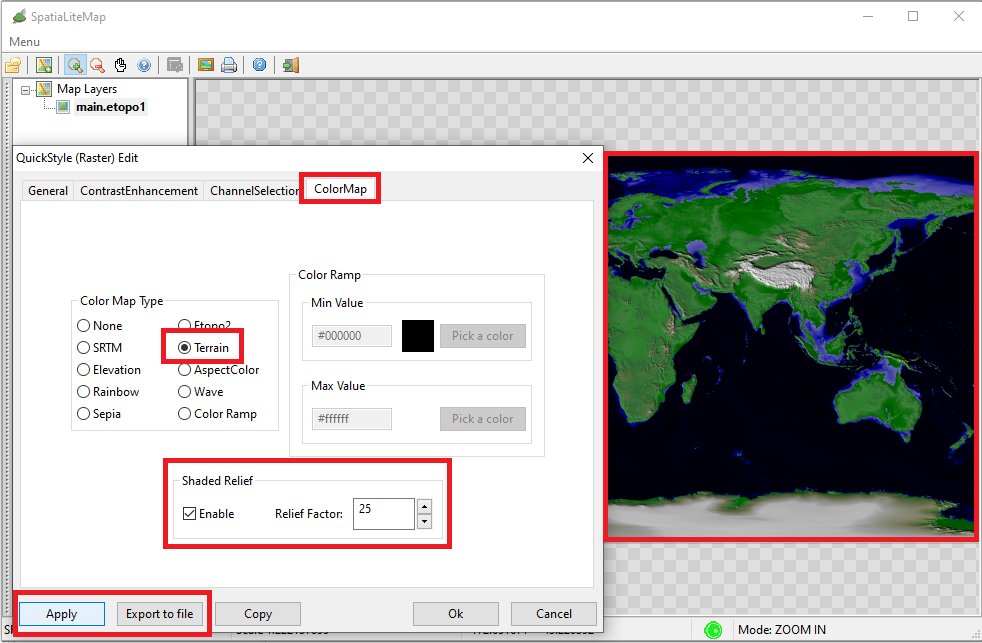
- Select the Terrain ColorMap, then press the Apply button so to check how the new QuickStyle will be displayed on the screen.
- Press the Export to file button and save the current QuickStyle into an external file named terrain.xml
|
The Terrain ColorMap might look very similar to Etopo2, but there is a striking difference:
- Etopo2 brings out all the details of the ocean floor, including ridges.
- Terrain instead merely represents the flat surface of the oceans.
|
| 
|
Yet another time:
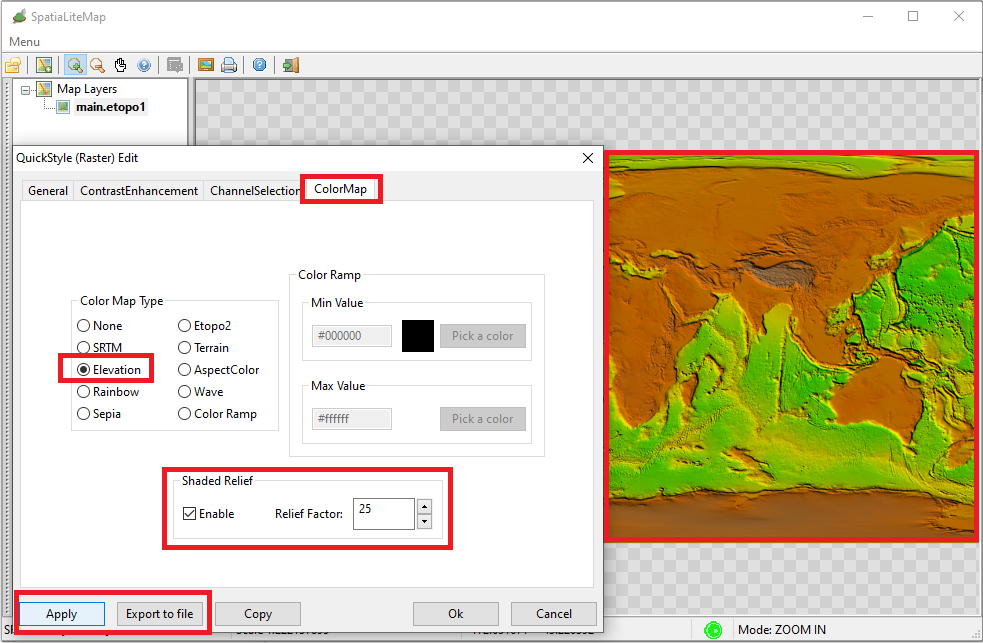
- Select the Elevation ColorMap, then press the Apply button so to check how the new QuickStyle will be displayed on the screen.
- Press the Export to file button and save the current QuickStyle into an external file named elevation.xml
|
|
The Elevation ColorMap is well fit for bringing out all the details of the ocean floor, including ridges.
|
| 
|
Now we'll see why in the above strep we saved the XML files corresponding to each QuickStyle, and what use we intend to make of them.
- QuickStyles have an inherently volatile nature; they simply exist in the context of a specific MapPanel, and will be lost once the MapPanel is closed.
- So now we will turn them into persistent Registered Styles that are permanently associated with Etopo1 MapCoverage.
- This is a very simple operation, that just requires to manually edit few lines on each XML file.
(You can use any text editor of your choice)
|
- open each XML file
- at the very beginning you must correct few lines as shown on the side figure.
- Tag <Name>: this is the PRIMARY KEY uniquely identifying each Style.
- QuickStyles are identified by an auto-generated UUID
- For Registered Styles setting a meaningul Name is surely most appropriate and useful.
- Tags <Title> and <Abstract>: further descriptive informations about the Style.
- QuickStyles just declare constant meaningless values.
- For Registered Styles setting meaningful values is warmly suggested.
- save and exit, and that's all.
|
|
	<Name>de8d1328-5bc7-417b-8656-b8c2239bdbc2</Name>
	<Description>
		<Title>Quick Style</Title>
		<Abstract>Created by SpatialiteGUI</Abstract>
	</Description>
	<Rule>
etopo2.xml (before editing)
        <Name>etopo2</Name>
	<Description>
		<Title>ETOPO2</Title>
		<Abstract>ETOPO2 Raster Style</Abstract>
	</Description>
	<Rule>
etopo2.xml (after editing)
	<Name>srtm</Name>
	<Description>
		<Title>SRTM</Title>
		<Abstract>SRTM Raster Style</Abstract>
	</Description>
	<Rule>
srtm.xml (after editing)
	<Name>terrain</Name>
	<Description>
		<Title>Terrain</Title>
		<Abstract>Terrain Raster Style</Abstract>
	</Description>
	<Rule>
terrain.xml (after editing)
	<Name>elevation</Name>
	<Description>
		<Title>Elevation</Title>
		<Abstract>Elevation Raster Style</Abstract>
	</Description>
	<Rule>
elevation.xml (after editing)
|
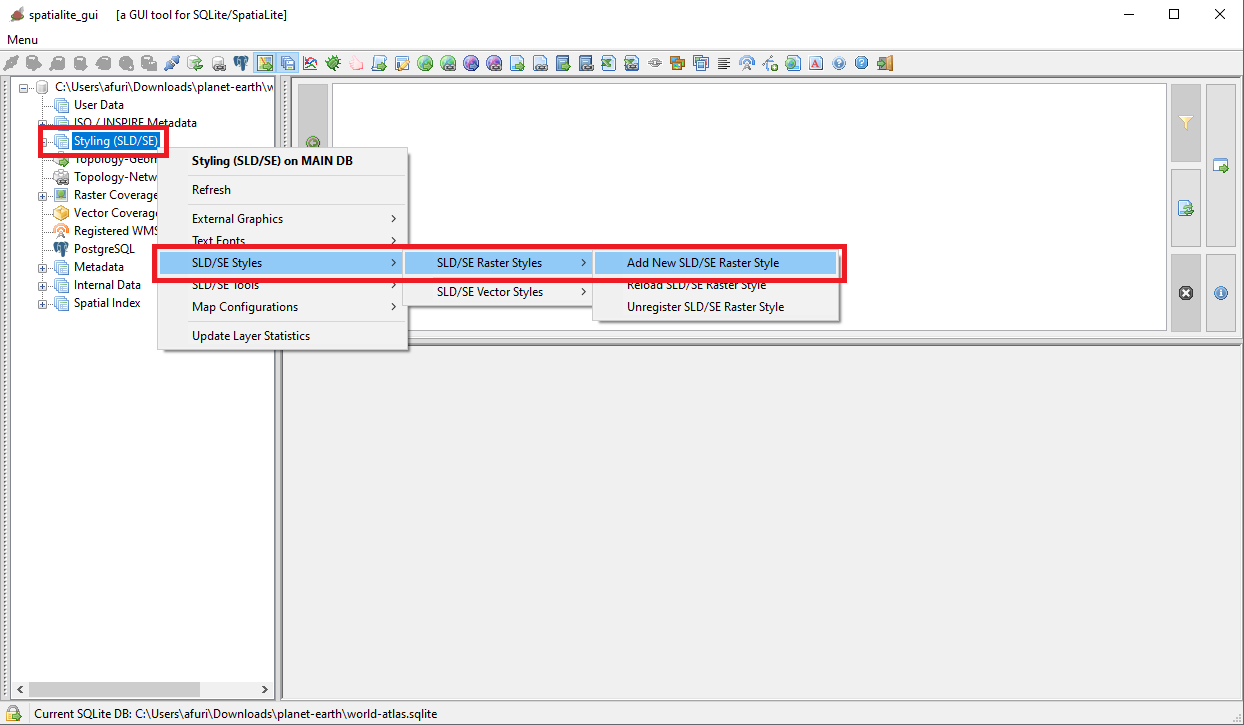
All right, after manually correcting the XML files you are now ready for importing them as permanent Registered Raster Styles
The side figure shows the menu item to select in order to begin this task.
|
| 
|
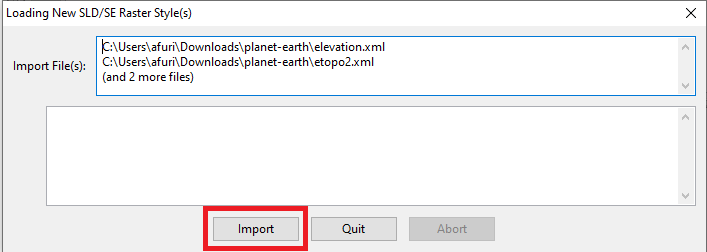
You are simply required to select the files you intend to import: you could eventually select all them in a single shot.
Then press the Import button on the dialog box.
|
Warning: the import process could eventually fail, usually for one of the following reasons:
- because a Style identified by the same <Name> is already registered (duplicated key)
- because the XML is malformed or violates someway the requirements of the declared XML Schema
|
| 
|
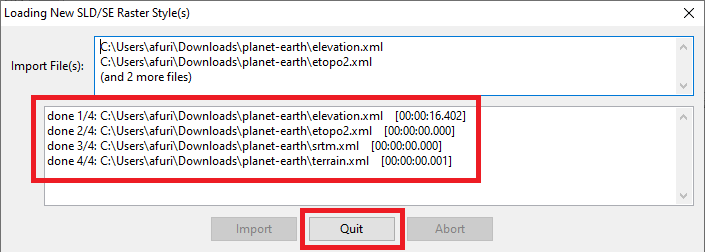
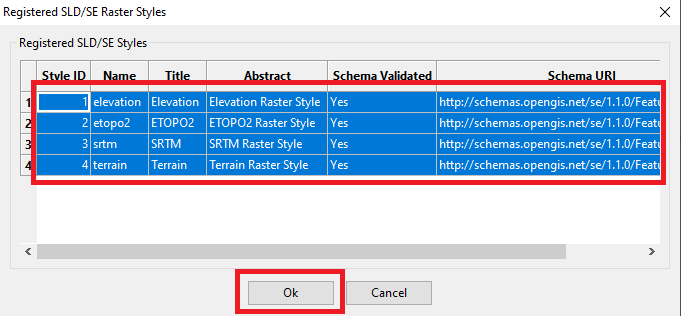
On succesful completion a final report will be shown.
Press the Quit button and that's all; your new Styles have now been permanently stored into the DB.
|
| 
|
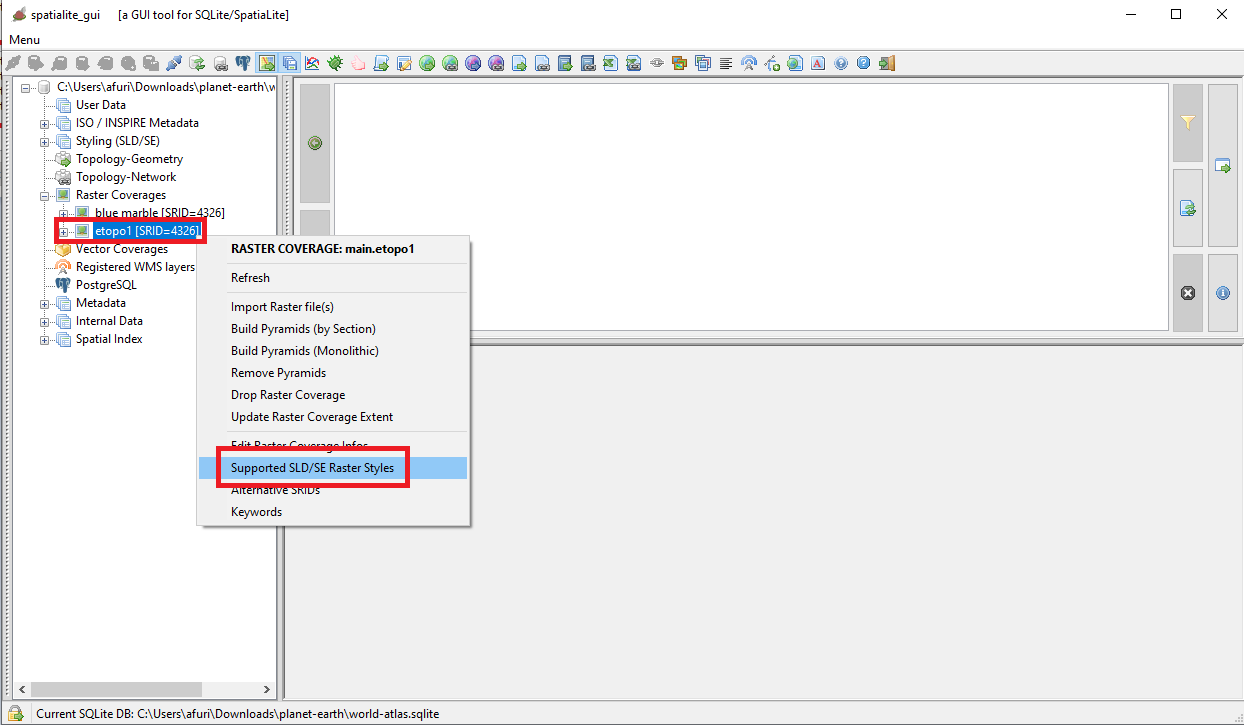
That's not yet enough: you are now required to permanently associate the newly inserted Styles to their Raster Coverage
The side figure shows the menu item to select for accomplishing this task.
|
| 
|
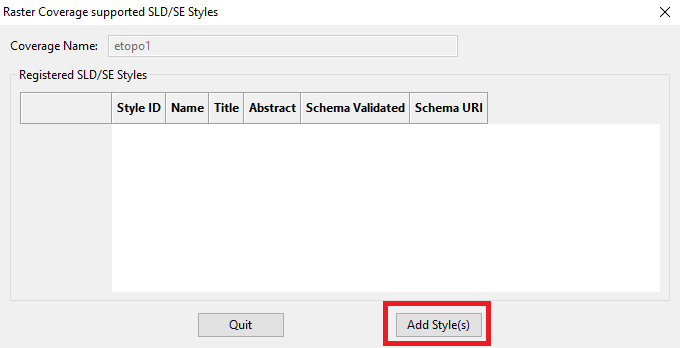
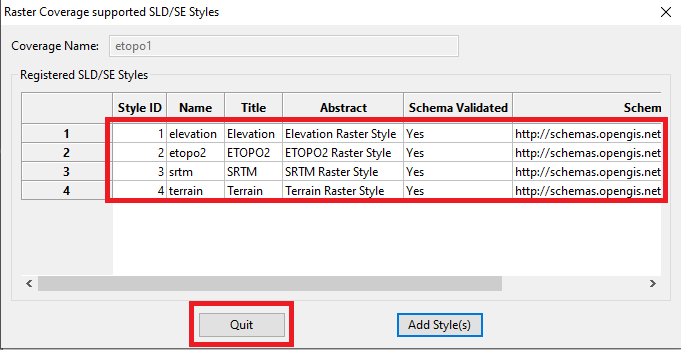
The Wizard box will be initially empty; this is because there isn't yet any Style permanently associated with the etopo1 Raster Coverage.
Now press the Add Style(s) button.
|
| 
|
A full list of all Registered Raster Styles will then be shown.
Select the Style(s) of specific interest (multiple selection is allowed).
And finally press the Ok button.
|
| 
|
As you can see all the four Styles have now been permanently associated with the etopo1 Raster Coverage.
Press the Quit button so to close the Wizard's dialog.
|
| 
|
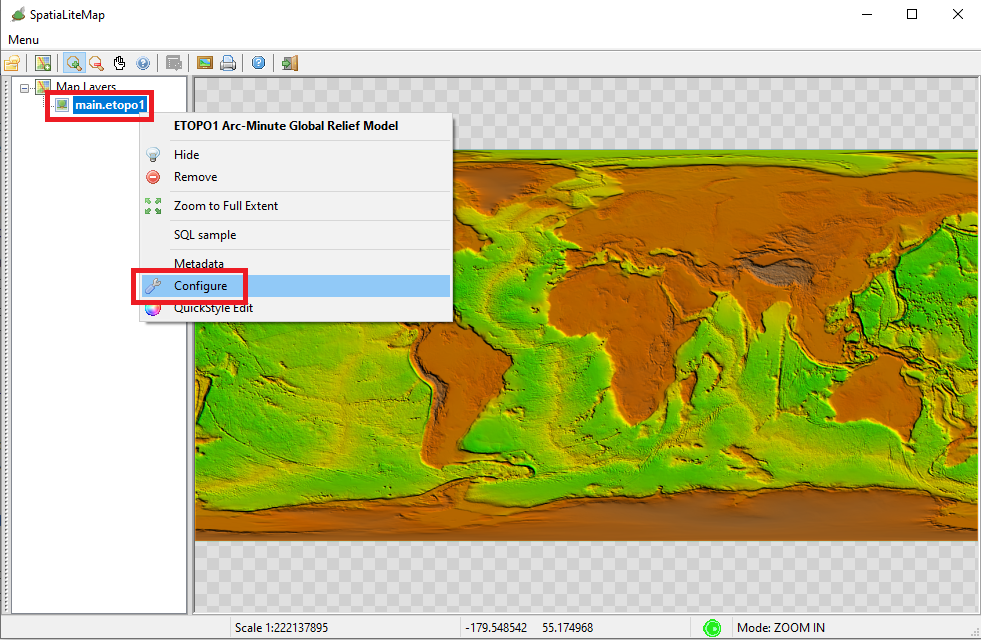
All right, now the etopo1 Raster Coverage has four different alternative Styles permanently associated.
For freely switching on-the-fly from the one to the other on the MapPanel you simply have to select the menu item shown on the side figure.
|
| 
|
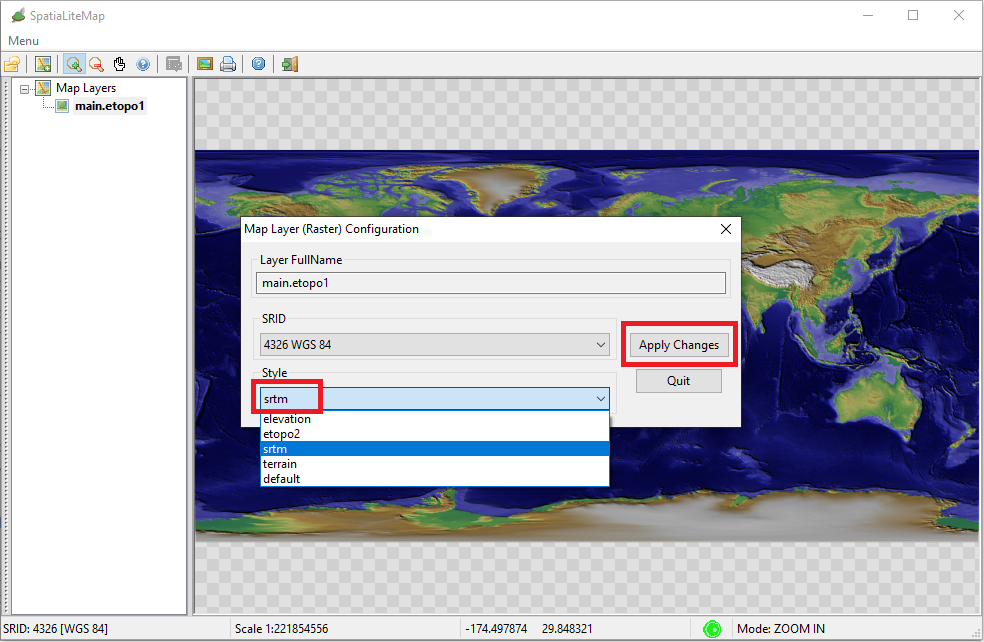
Now from the Map Layer Configuration dialog box:
- Expand the list associated with the Style ComboBox.
- Then select the specific Style you intend to apply to the Map.
- Finally press the Apply Changes button
The MapPanel will be immediatly updated accordingly to the current setting.
|
| 
|
, and will always offer full SQL support for all functionalites.