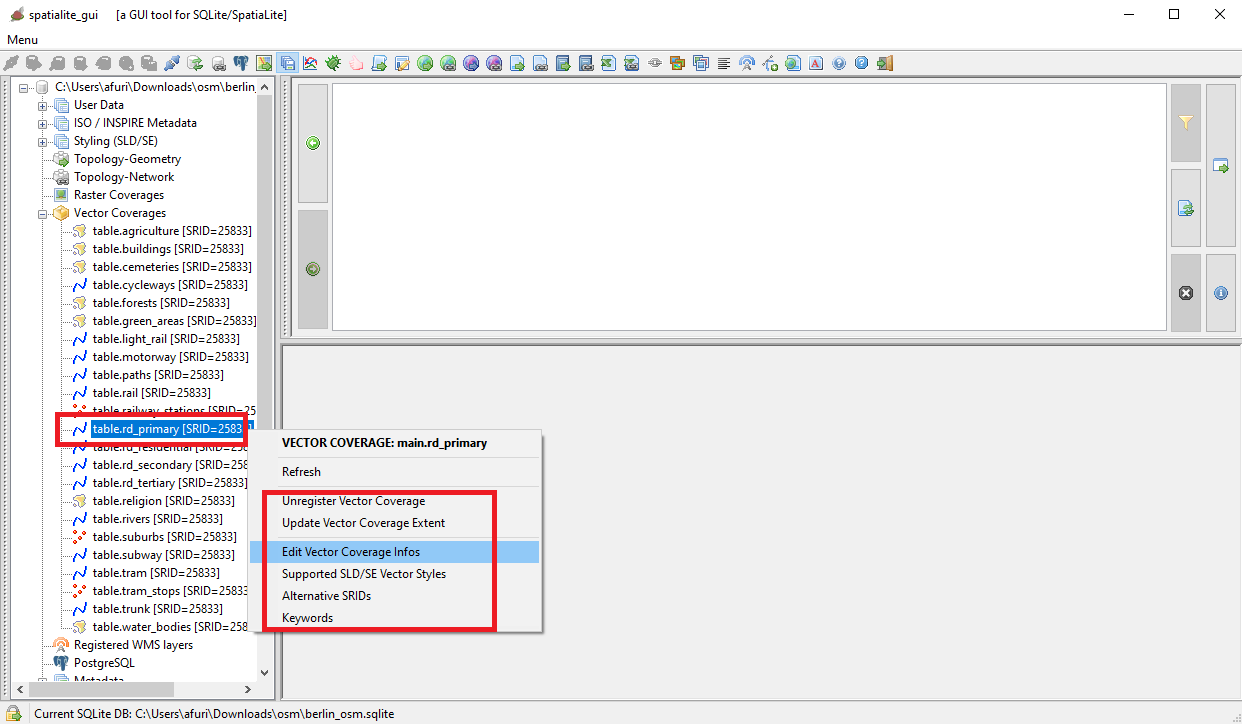
All right; now all Spatial Tables have been promoted to Vector Coverages.
We era finally ready to open a Map Panel then adding all our OSM-based Vector coverages, so to progressively build the full Map.
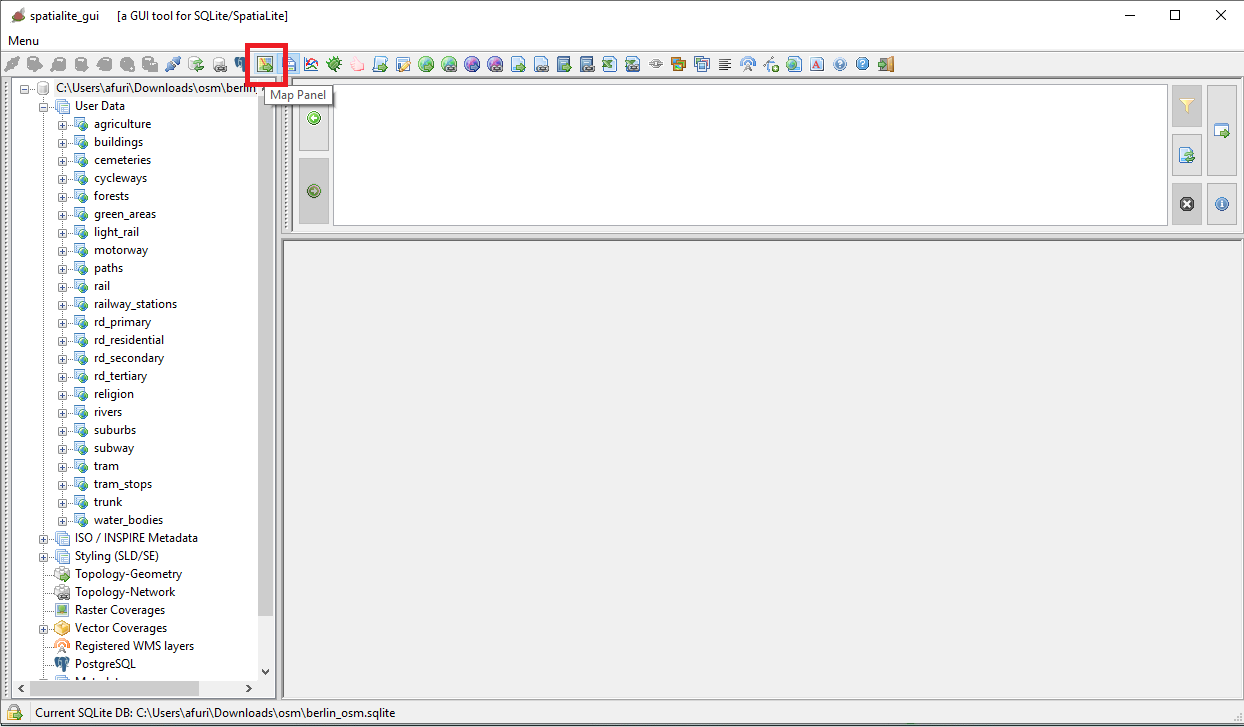
You are simply required to press the button on the toolbar shown on the side figure.
|
| 
|
The Map Panel will be immediately displayed on the screen; however it will be small-sized and completely empty.
This is rather obvious, because we haven't yet attached any map layer aka Vector Coverage to the current Map.
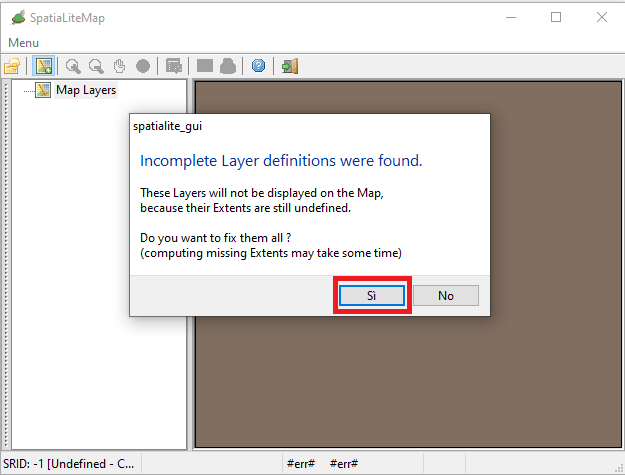
Even more important, a message box will appear informing you that all Vector Coverages found are still lacking their Extents definitions.
Just confirm and anything will be automatically set up as required.
|
Hint: if you can arrange a dual monitor layout it's now time to move the Map Panel on the other screen maximizing its size.
This way you'll have a widely better user experience.
|
| 
|
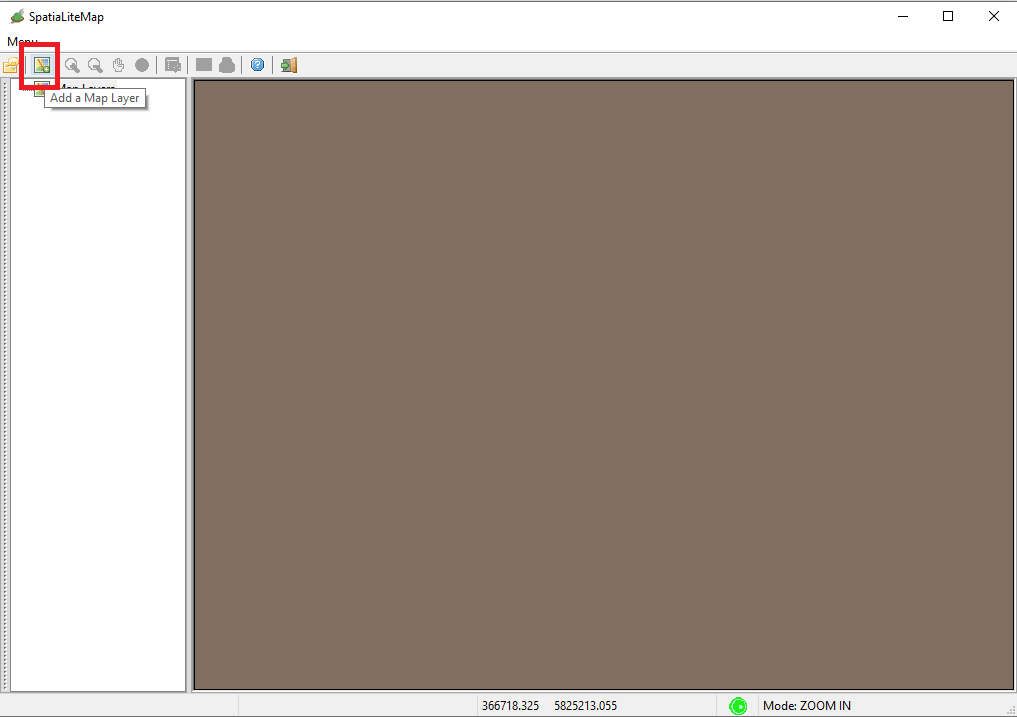
The Map Panel is still empty; it's now time to attacht the first Vector Converage to the current Map.
Just press the button on the toolbar shown on the side figure.
|
| 
|
From the list panel that will be shown select one or two Vector Coverage(s), then confirm and the selected layes(s) will immediatly be drawn on the Map.
Selection of multiple layers is supported: just press shift or ctrl when selecting a layer from the list.
|
Warning: never ever select too much layers in a single shot.
Such a stupid action will simply produce a messy and meaningless Map, and will almost probably cause a deadly slow rendering process lasting forever.
You have been warned !!!
|
| 
|
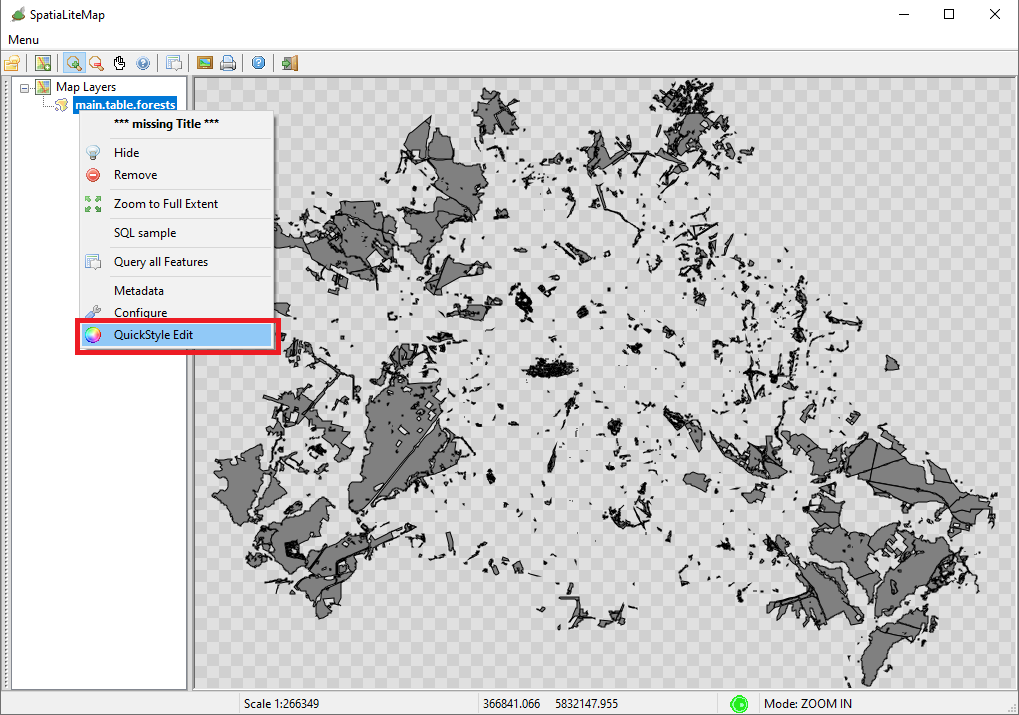
The layer we've just selected now appears on the Map but it looks decisively awfull, all gray and black.
This simply is because we haven't yet defined any styling rule for it, and consequently the layer is currently supported by an all gray default symbolizer.
|
It's now time to define a decent symbolizer supporting the layer.
- press the right button of the mouse over the Layer definition appearing on the list of layer associated to the Map.
- Then on the context menu select the QuickStyle Edit item.
|
| 
|
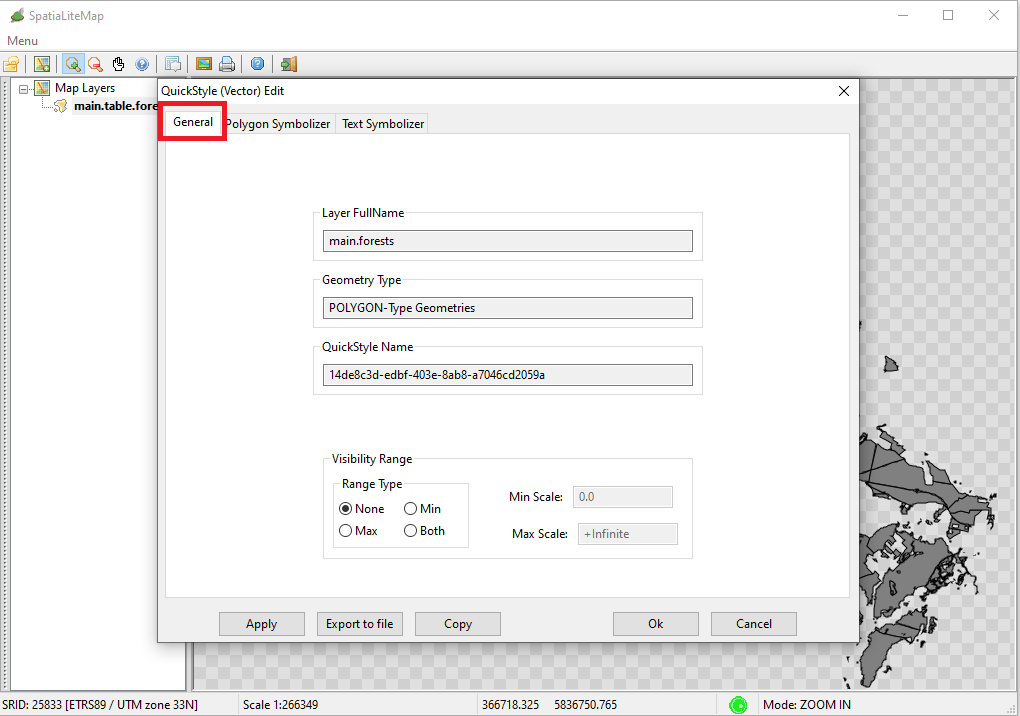
This one is a tabbed dialog box.
This layer does not require a conditional Visibility Range, so we'll leave anything as it is in the General tab.
|
|
Note: any QuickStyle is inherently volatile by its nature, and is uniquely identified by an automatically generated UUID.
|
| 
|
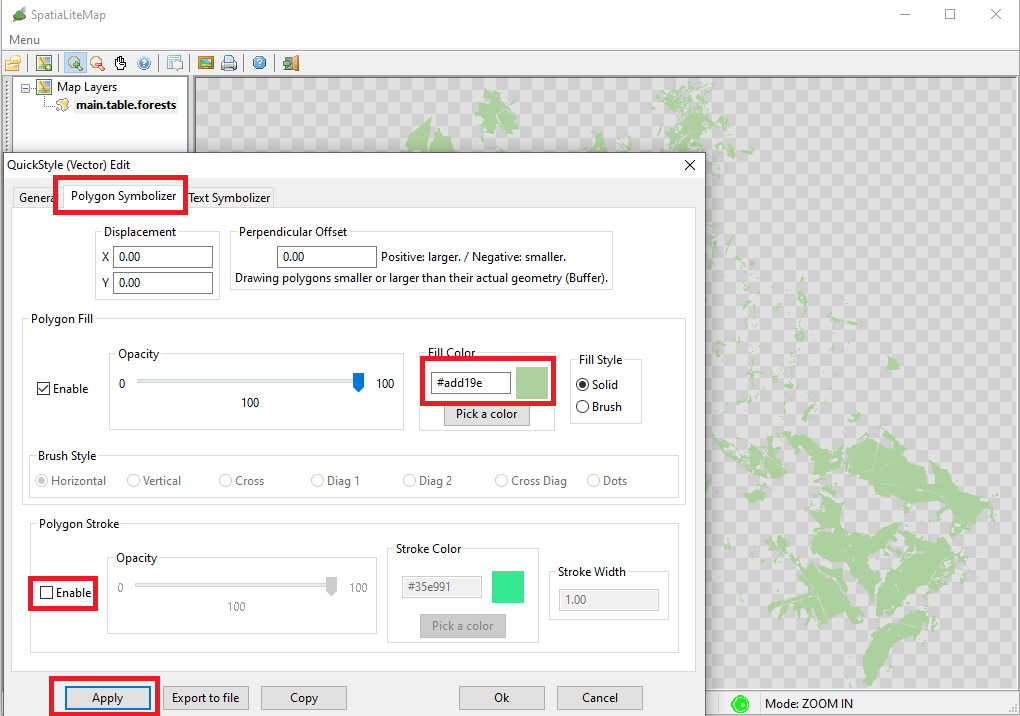
The Polygon Symbolizer is surely more interesting.
We are currently configuring the style for the forests layer, that is of the Polygonal type.
We'll require to internally fill all polygons in a well-loocking solid green (#add19e in hexadecimal RGB).
Then we'll uncheck the Stroke option so to avoid drawing the border of polygons.
That's all: just press the Apply button and the Map will be immediately updated on the screen.
|
Meaning of the dialog's buttons
- the Apply button will immediately update the Map on the screen without saving the current style.
- the Ok button will close the dialog permanenly saving the current style.
- the Cancel bytton will close the dialog without saving the current style.
- the Export to file button will save into an external file the canonical XML SLD/SE corresponding to the current style.
- the Copy button will copy into the ClipBoard the canonical XML SLD/SE corresponding to the current style.
|
| 
|
|
Just for the sake of curiosity, what you read in the side panel is the canonical XMLSLD/SE representing the style we've just created.
|
Lesson to keep in mind:
- The canonical XML representations of SLD/SE Styles aren't necessarily intuitive and user-friendly.
Many users could easily find them too difficult and almost impossible to handle.
- But the GUI tools support many usefull Wizards that will auto-write for you XML Styles in the most easy and user-friendly way.
- This is enough for many average users; advanced users can still take full advantage of the limitless power of XML Styles, may well be by starting from some basic auto-written snippet to be manually refined.
|
|
<?xml version="1.0" encoding="UTF-8"?>
<PolygonSymbolizer version="1.1.0"
  xsi:schemaLocation="http://www.opengis.net/se http://schemas.opengis.net/se/1.1.0/Symbolizer.xsd"
  xmlns="http://www.opengis.net/se"
  xmlns:ogc="http://www.opengis.net/ogc"
  xmlns:xlink="http://www.w3.org/1999/xlink"
  xmlns:xsi="http://www.w3.org/2001/XMLSchema-instance"
  uom="http://www.opengeospatial.org/se/units/pixel">
	<Name>14de8c3d-edbf-403e-8ab8-a7046cd2059a</Name>
	<Description>
		<Title>Quick Style - Polygon Symbolizer</Title>
		<Abstract>Created by SpatialiteGUI</Abstract>
	</Description>
	<Fill>
		<SvgParameter name="fill">#add19e</SvgParameter>
		<SvgParameter name="fill-opacity">1.00</SvgParameter>
	</Fill>
</PolygonSymbolizer>
|