Many hyperlinks are disabled.
Use anonymous login
to enable hyperlinks.
Overview
| Artifact ID: | 300fb3e88cefc9a32ff47e606864dd39e3bb546f |
|---|---|
| Page Name: | Sample Planet Earth |
| Date: | 2020-09-12 10:51:13 |
| Original User: | sandro |
| Parent: | b6d1a6c58a2fcf86fe9747194f2a9472389b9f3a (diff) |
| Next | 739d20864e5850dda0ba51aa3a134cb15c15fb9d |
Content
Quick How-To Guide for the Planet Earth sample
In this tutorial we'll assume that you've already studied and understood the tutorials about the Giglio sampleNow we'll examine the Planet Earth sample which will allow us to delve further into new details that we previously ignored.
The following table summarizes for quick reference all Coverages contained into the Planet Earth sample database:
| Coverage name | Type | Description |
|---|---|---|
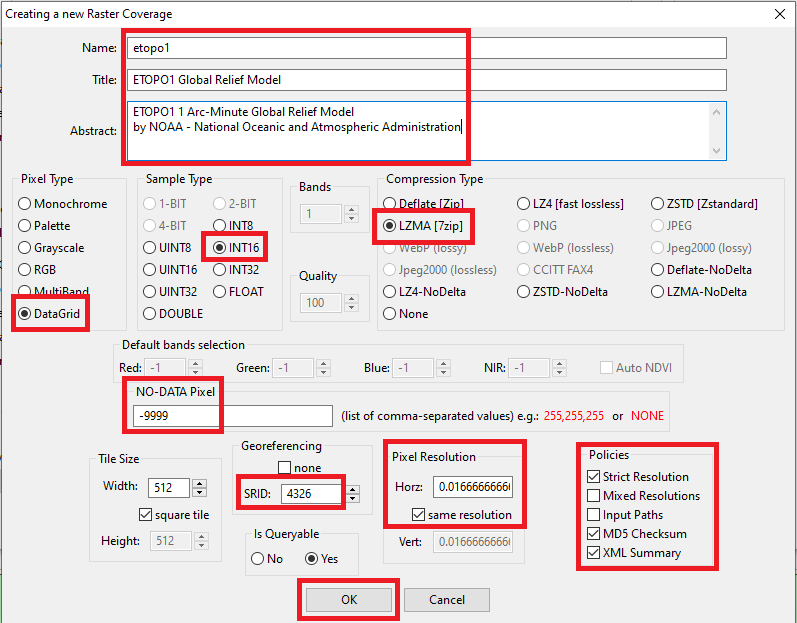
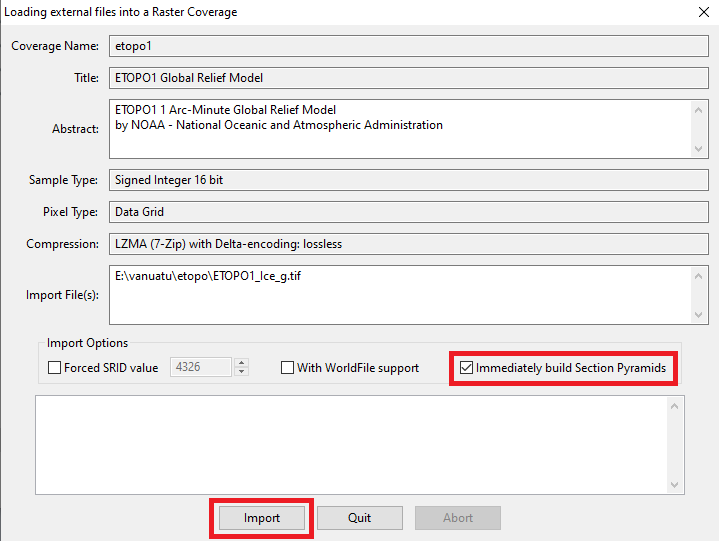
| etopo1 | Raster | Global DEM - Digital Elevation Model |
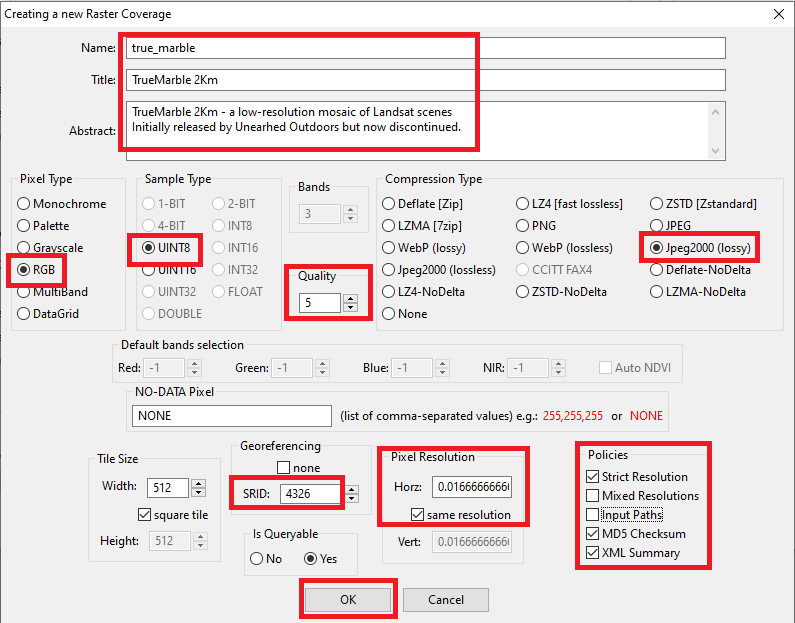
| true_marble | Raster | Natural colors - RGB low-resolution mosaic of Landsat imagery |
| countries | Vector | 2D Polygons - National Boundaries |
| countries_vw | Vector | Spatial View derived from countries |
| topo_states | Vector | Topology derived from countries |
All datasets are based on open data available at the following URLs:
- ETOPO1: NOAA
- True Marble: Unearthed Outdoors
- Countries: Natural Earth
Step #1 - General Introduction | ||
|---|---|---|
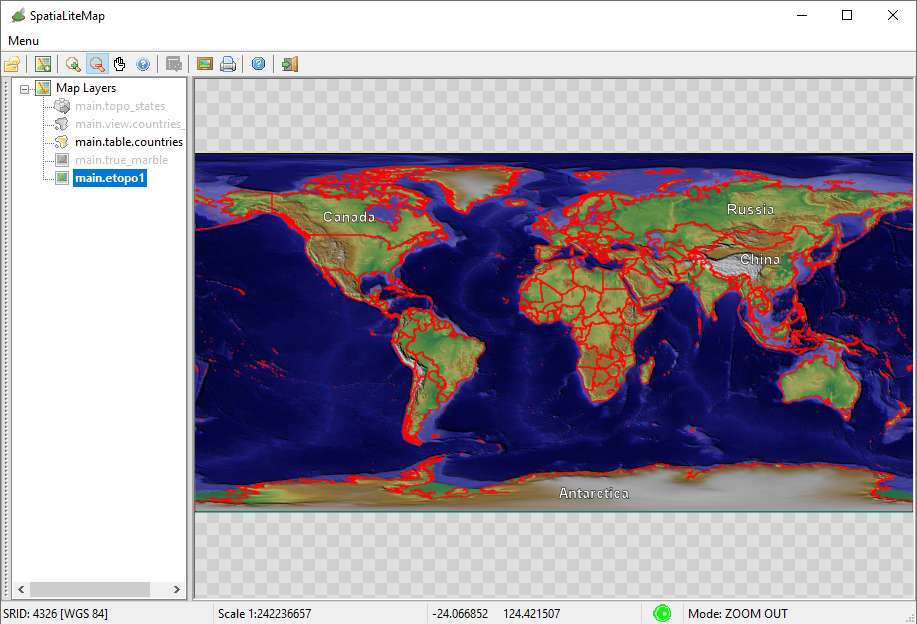
Step #1.1 - Testing the ETOPO1 backgroundThe side figure shows how the Map will be when applying the following layers selection:
|
| |
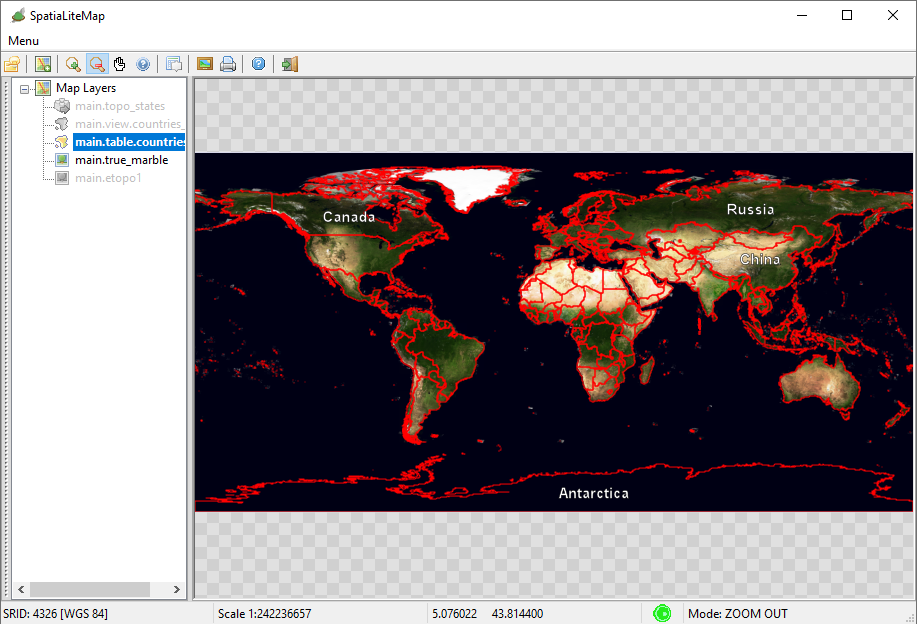
Step #1.2 - Testing the True Marble backgroundThe side figure shows how the Map will be when applying the following layers selection:
|
| |
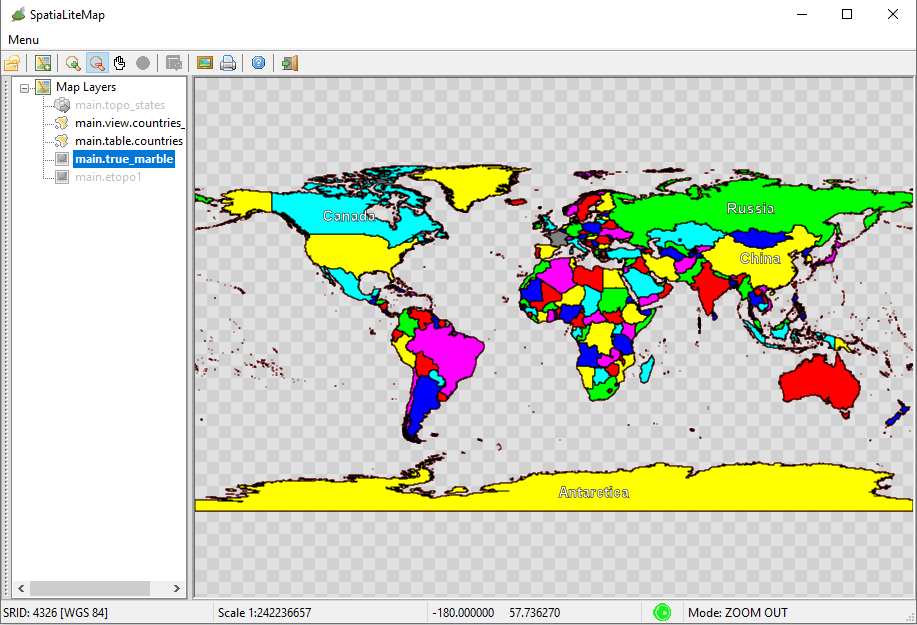
Step #1.3 - Testing the Political MapThe side figure shows how the Map will be when applying the following layers selection:
|
| |
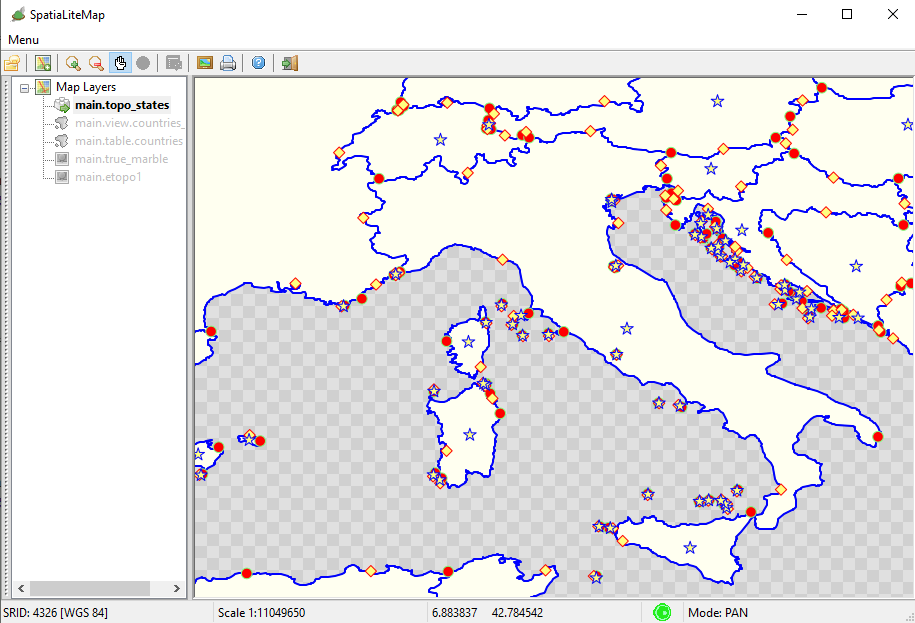
Step #1.4 - Testing TopologyThe side figure shows how the Map will be when applying the following layers selection:
|
| |
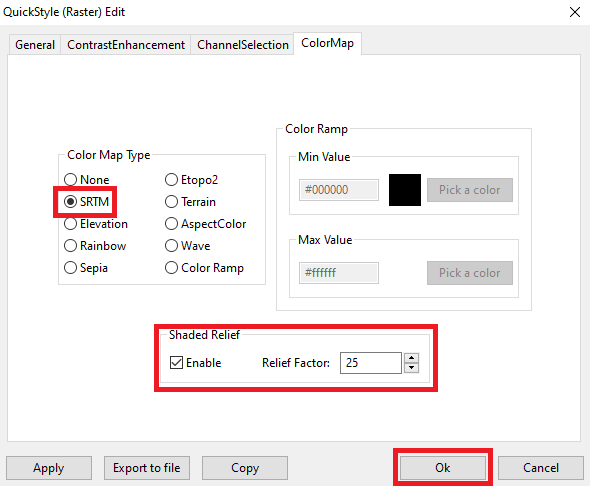
Step #2 - Creating, populating and styling the Raster Coverages | ||
Step #2.1 - Preparing to load the Coverages in MapPanel |
| |
Step #2.1 - Preparing to load the Coverages in MapPanel |
| |
Step #2.1 - Preparing to load the Coverages in MapPanel |
| |
Step #2.1 - Preparing to load the Coverages in MapPanel |
| |
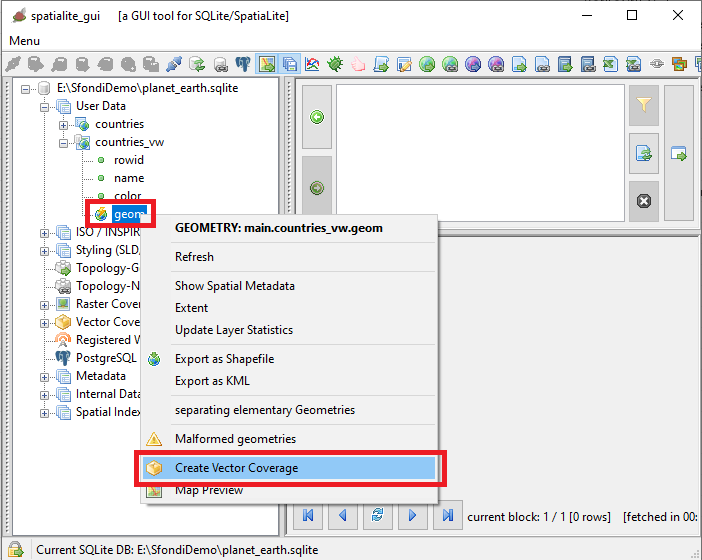
Step #3 - Creating, populating and styling a Vector Coverage based on a Spatial Table | ||
Step #3.1 - Preparing to load the Coverages in MapPanel |

| |
Step #3.2 - Preparing to load the Coverages in MapPanel |

| |
Step #4 - Creating, populating and styling a Vector Coverage based on a Spatial View | ||
Step #4.1 - Preparing to load the Coverages in MapPanel |
CREATE VIEW countries_vw AS
SELECT pk_uid AS rowid, name AS name,
    CASE mapcolor7
        WHEN 1 THEN '#FF0000'
        WHEN 2 THEN '#00FF00'
        WHEN 3 THEN '#0000FF'
        WHEN 4 THEN '#FFFF00'
        WHEN 5 THEN '#FF00FF'
        WHEN 6 THEN '#00FFFF'
        ELSE '#808080'
    END color, geometry AS geom
FROM countries;

INSERT INTO views_geometry_columns VALUES
    ('countries_vw', 'geom', 'rowid', 'countries', 'geometry', 1);
| |
Step #4.2 - Preparing to load the Coverages in MapPanel |
| |
Step #4.3 - Preparing to load the Coverages in MapPanel |
<?xml version="1.0" encoding="UTF-8"?>
<PolygonSymbolizer version="1.1.0"
    xsi:schemaLocation="http://www.opengis.net/se http://schemas.opengis.net/se/1.1.0/Symbolizer.xsd"
    xmlns="http://www.opengis.net/se" xmlns:ogc="http://www.opengis.net/ogc"
    xmlns:xlink="http://www.w3.org/1999/xlink"
    xmlns:xsi="http://www.w3.org/2001/XMLSchema-instance"
    uom="http://www.opengeospatial.org/se/units/pixel">
    <Name>countries_col</Name>
    <Description>
        <Title>Countries - Political Map</Title>
        <Abstract>A Style setting its Fill color from a Column Value</Abstract>
    </Description>
    <Fill>
        <SvgParameter name="fill">@color@</SvgParameter>
        <SvgParameter name="fill-opacity">1.00</SvgParameter>
    </Fill>
    <Stroke>
        <SvgParameter name="stroke">#000000</SvgParameter>
        <SvgParameter name="stroke-opacity">1.00</SvgParameter>
        <SvgParameter name="stroke-width">1.00</SvgParameter>
        <SvgParameter name="stroke-linejoin">round</SvgParameter>
        <SvgParameter name="stroke-linecap">round</SvgParameter>
    </Stroke>
</PolygonSymbolizer>
| |
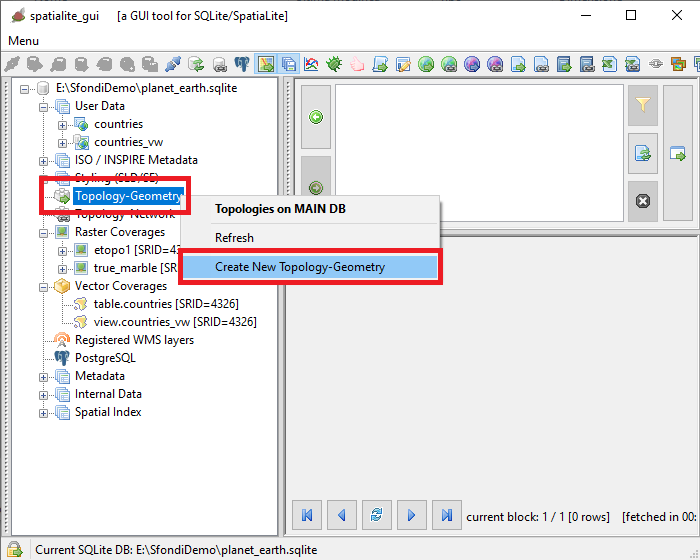
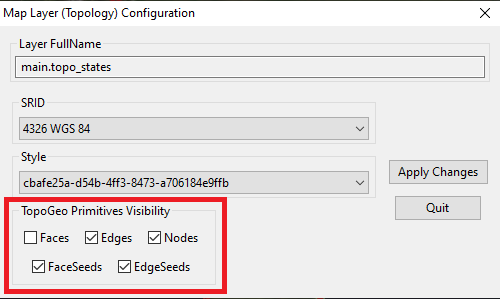
Step #5 - Creating, populating and styling a Vector Coverage based on a Topology | ||
Step #5.1 - Preparing to load the Coverages in MapPanel |
| |
Step #5.2 - Preparing to load the Coverages in MapPanel |

| |
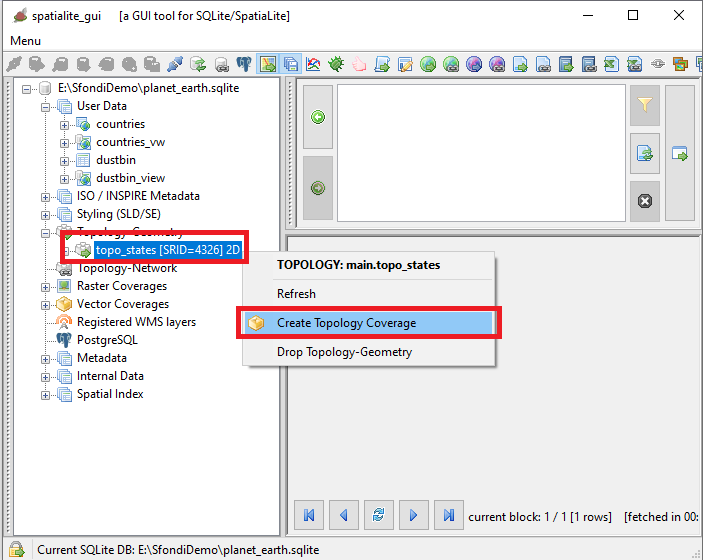
Step #5.3 - Preparing to load the Coverages in MapPanel |
SELECT TopoGeo_FromGeoTableNoFaceExt('topo_states', NULL, 'countries', NULL, 'dustbin', 'dustbin_view', 512);

SELECT TopoGeo_Polygonize('topo_states');

SELECT TopoGeo_UpdateSeeds('topo_states');
| |
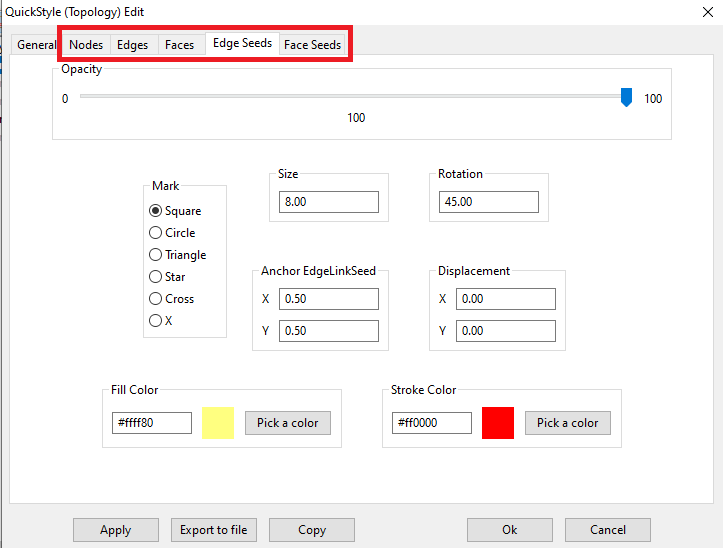
Step #5.4 - Preparing to load the Coverages in MapPanel |
| |
Step #5.5 - Preparing to load the Coverages in MapPanel |
| |
Step #5.6 - Preparing to load the Coverages in MapPanel |
| |