A few simple things that will help you get the most from LibreAtlas
LibreAtlas is a simple application mainly intended for teaching and learning about Geography.Think of the LibreAtlas application as a player/viewer of geography information. That information needs to be provided in the form of a LibreAtlas database. Don't be worried, there is absolutely nothing complex in this. A LibreAtlas database is just a file that you place somewhere on your hard disk, then open with LibreAtlas.
So to get started, you simply:
- install the LibreAtlas application
note for Windows users: "to install" in this case simply means "just copy somewhere", no complex installation is required. - download or copy a LibreAtlas database of your choice
- when starting the application for the first time, you open the LibreAtlas database
- and that's absolutely all!
More about the LibreAtlas databases
You can find any relevant information on the specific Wiki pages: WorldAtlas, ItalyRailAtlas, PiemonteAtlas and LunarAtlasA very quick how-to tutorial
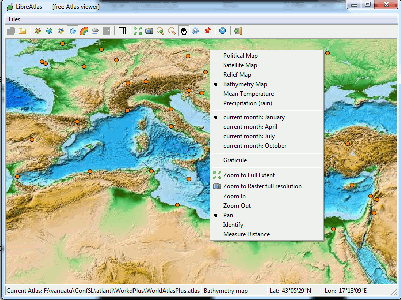
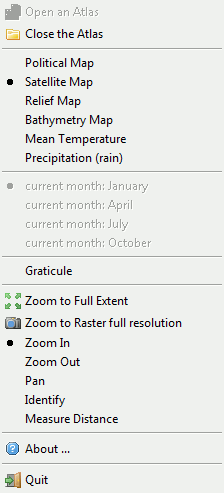
| Menu and toolbar | ||
|---|---|---|
|

|
|
| ||
| ||
| Zooming and panning | ||
| ||
| On-the-fly identify | ||
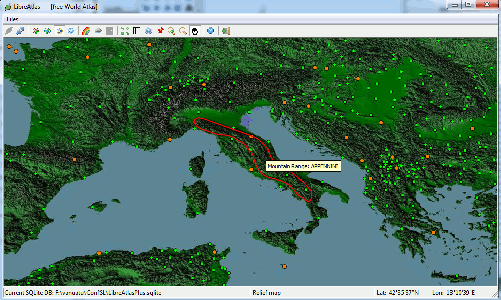
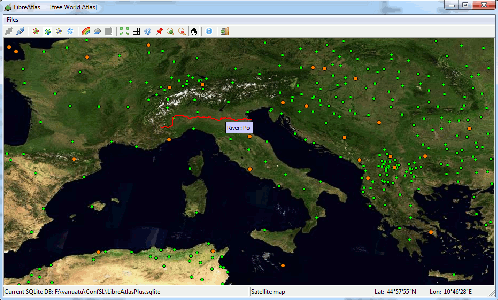
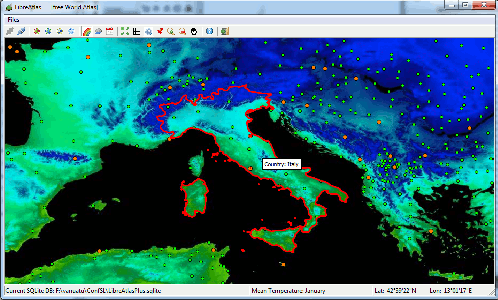
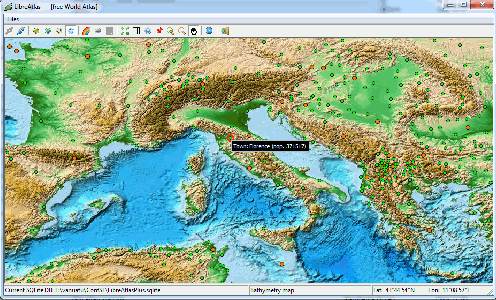
| While moving the mouse on the map, if some relevant geographic feature is detected at the corresponding coordinates, a small tip will appear; and the intercepted feature will be evidenced on the map. | ||
|
Example #1 maritime areas on-the-fly detection i.e. seas, oceans, gulfs and alike |

| |
|
Example #2 land areas on-the-fly detection i.e. mountain ranges, plains and alike |
| |
|
Example #3 hydrography on-the-fly detection i.e. rivers, lakes and lagoons |
| |
|
Example #4 Country on-the-fly detection |
| |
|
Example #5 Town on-the-fly detection |
| |
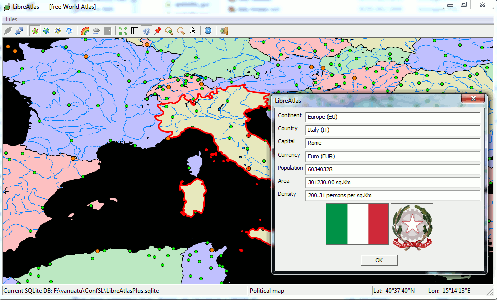
| Country Identify | ||
|
When the Identify tool is selected, performing a mouse click (left button) on some land map area will cause Country identification. i.e. a small dialog box will appear, reporting several general infos about the intercepted Country, this including the National Flags and the National Emblem / State Seal. |
| |
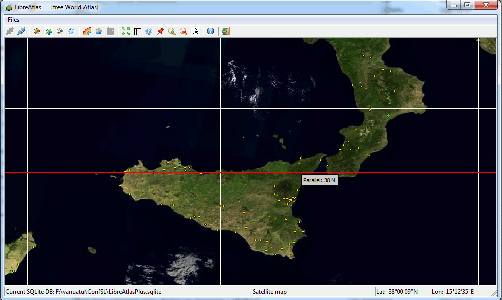
| Graticule | ||
|
When the Graticule tool is selected, Meridians and Parallels will be shown over the map. And On-the-fly identify will be applied all times that a Meridian or Parallel is intercepted. |
| |
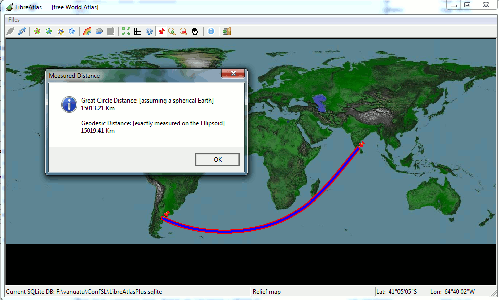
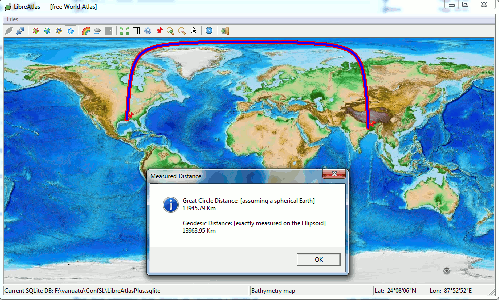
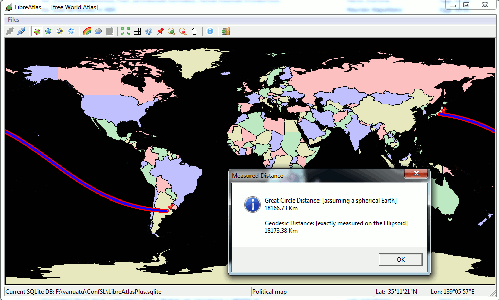
| Measuring Distances | ||
|
When the Distance tool is selected, you can measure the distance between two points on the Earth's surface. Each mouse click (left button) will select a point. Each time that a pair of points is selected, the corresponding distance will be shown on a dialog box, and the geodesic path will be shown over the map. |
| |
|
Please note: Planet Earth is a sphere (not exactly, it's a geoid, quite approximating an ellipsoid). So minimum length paths does actually follow Great Circle aka Geodetic lines. |
| |
| So please don't be surprised if geodetic lines do not look at all like straight lines. |
| |